This article will show you how to automatically move documents to an existing contract space or create a new contract space on the fly with Automation Builder. To get started, click on the Automations tab in the top bar menu and then click on the blue button Create new at the upper right-hand corner.
How can I configure the trigger event?
You will be redirected to a pop-up window where you can customise the automation's setup. You can in theory start the automation with any trigger, however, we see the “Move to space” action mostly used with the trigger “Draft is created”. Selecting this option in the drop-down menu will automatically open a configuration window to the right in which you can define which contract draft should start the automation.
You can assign the trigger to every draft you create or drafts from a specific template. We will use Every draft from a specific template for our automation flow.
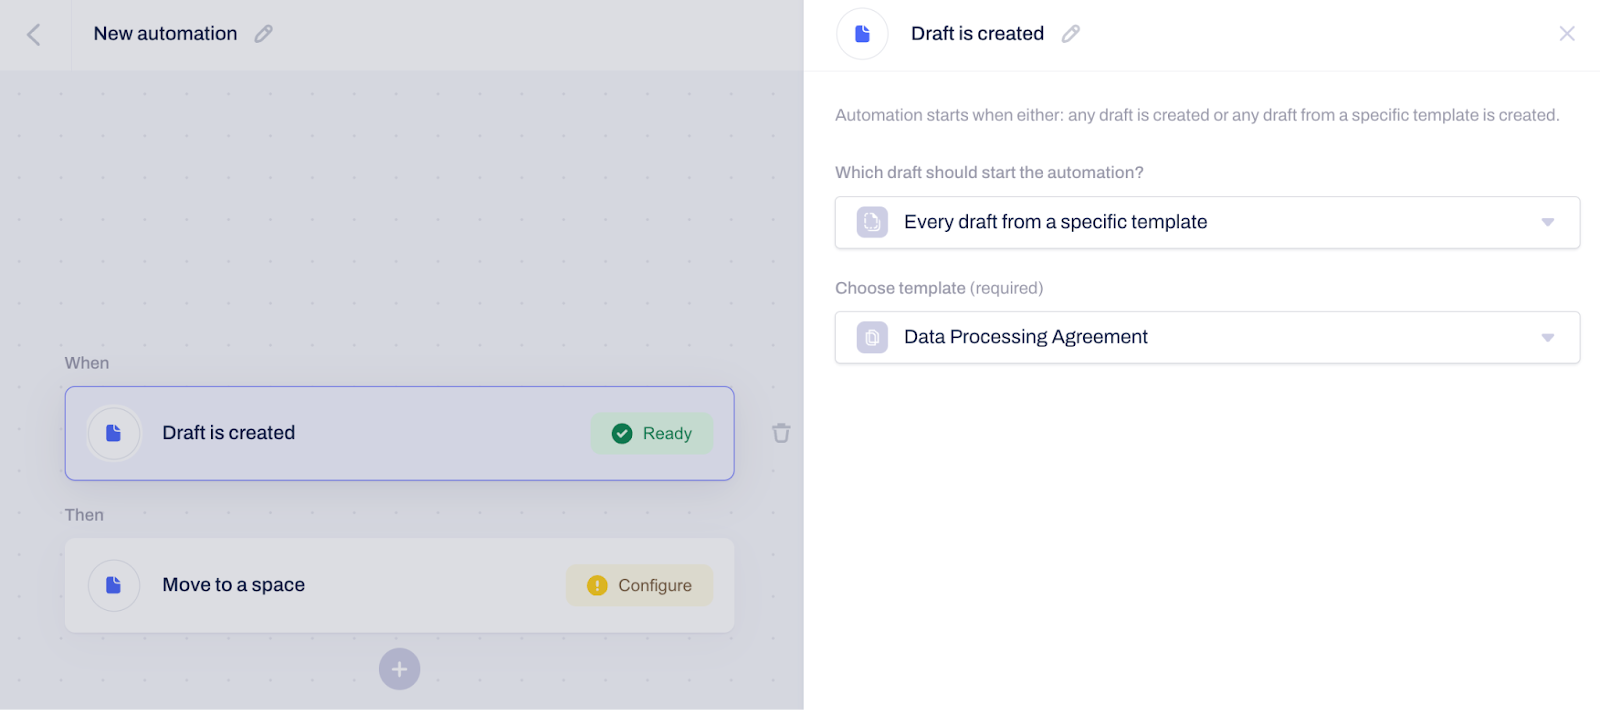
If you selected the second option, as we did, you could use the search bar to find the template you want to base the automation flow. If you have several templates sharing the same name, click the small eye icon to open it directly for review. After choosing the correct template, confirm by clicking Save, and the next step in the automation setup will be displayed.
How can I configure the automation action?
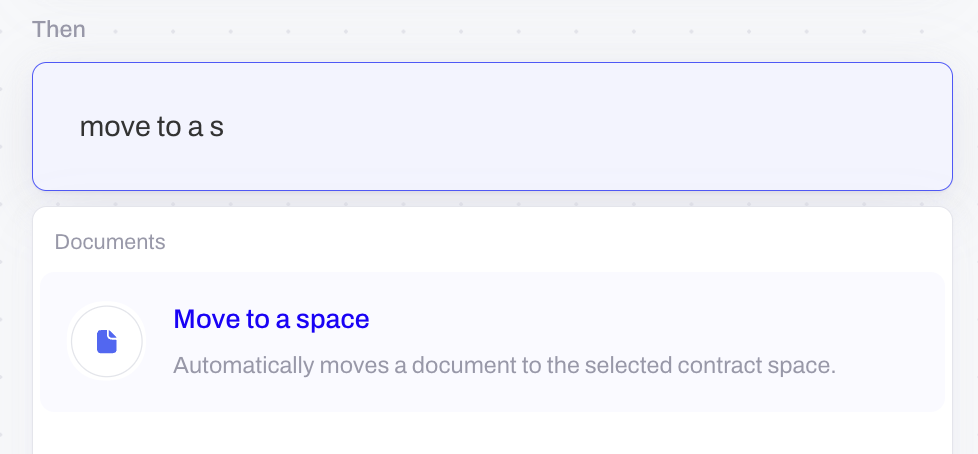
This step covers the action the automation trigger you have defined will generate. You can use the search bar to locate the option “Move to a space”.
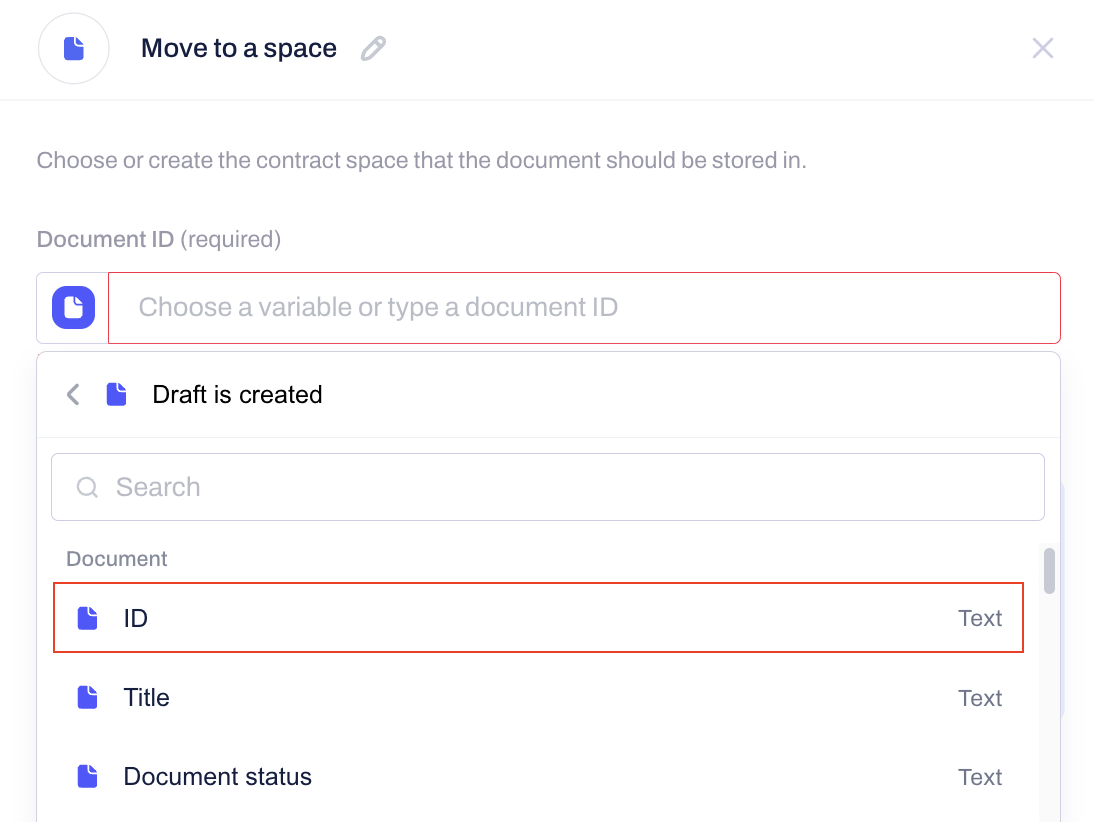
A new configuration window will appear on the right side of the screen. The first detail in the automation configuration's action step is to connect the Document ID from your trigger event, which will be used to identify the right document to execute the automation.
Next, you have two options to select a contract space to move contracts to.
The default option is to “Choose from the list of contract spaces” and simply select an existing contract space that you want to move all drafts affected by this automation to. You can choose from the list of all spaces and sub-spaces you have access to.
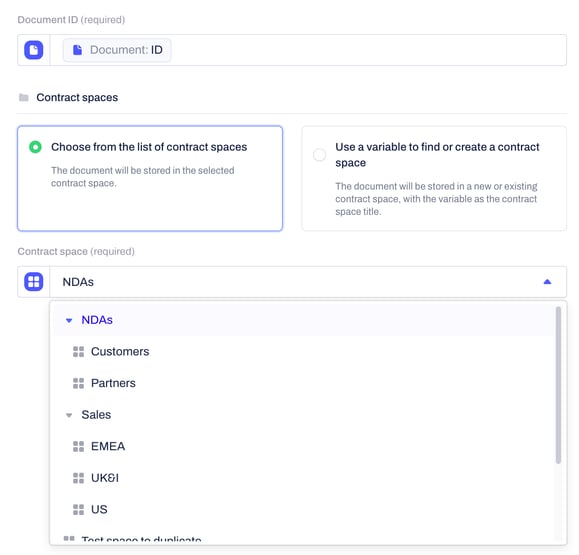
Note: You can only select contract spaces to which you have at least “Manage contracts” permission.
If you want to find or create a new space on the fly based on some dynamic data from a contract, you can also “Use a variable to find or create a new contract space”. Enter any dynamic data from your contract or previous automation steps into the input field "Create contract space". During an automation run, we will first try to find a contract space with the specific name. If none such contract space exists, a new contract will be created. To operate within a nested space tree, you can also specify the location for finding or creating a new contract space.
Note: You can only create a new contract space within an existing space tree if you have “Manage space” permission on the parent space.
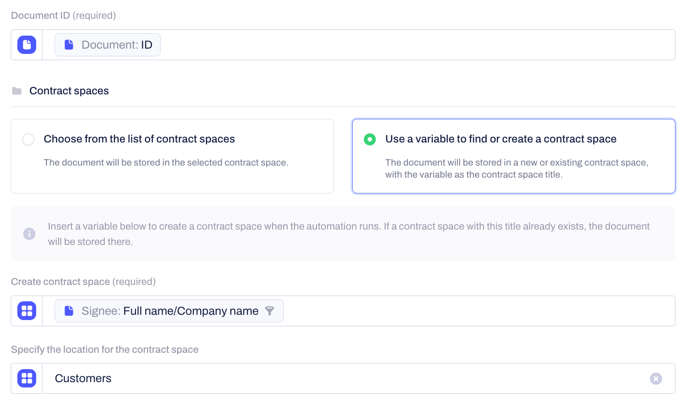
Examples of this could be to create a new space per counterparty or per contract owner. However, to avoid cluttering your account with too many contract spaces, we’d recommend you go with the simple option first and create a few high-level spaces manually that you select statically in here.
Once you have that step done, click Save to confirm the automation configuration and then Publish in the upper right-hand corner to put it into use. From here on, all contract drafts created from a certain template will be moved to a contract space automatically.
