
In this article, we will show you how to automatically create a new contract draft when an opportunity stage in Salesforce is changed and how to update Salesforce opportunity properties.
It contains the following topics:
- Quick demo
- Step-by-step tutorial - draft a contract upon Salesforce opportunity change
- Configuring the automation trigger
- Adding conditional logic to the Salesforce opportunity
- Using Salesforce opportunity list variables
- Configuring the automation action
- Defining the draft ownership of the automation
- Using the details tab
- Using the data tab
- Using the table tab (dynamic tables)
- Using the other tab
- Updating a salesforce opportunity upon contract signature
- Updating the Salesforce properties
- Using the automation
- Click here to take a look at how you can generate tailored Sales contracts based on Salesforce data using a Dynamic Template.
How do you automatically create a new contract draft when an opportunity stage in Salesforce changes?
With the help of our in-app Automation Builder, you can automatically create a new contract draft as soon as an opportunity stage in Salesforce has been changed.
With the contract template and your Contractbook connection with Salesforce established, we can begin setting up the automation flow.
- Click on the Automations tab in the top menu and choose My automations from the left-hand sidebar.
- You will see a few predefined automation flows to select and use. To create your own, click Create new button from the upper right-hand corner.
How can I configure the trigger event?
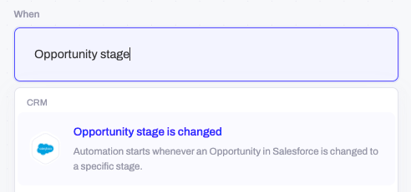
- The first thing you need to do is to set the trigger event which must occur in order for the automation to be executed.
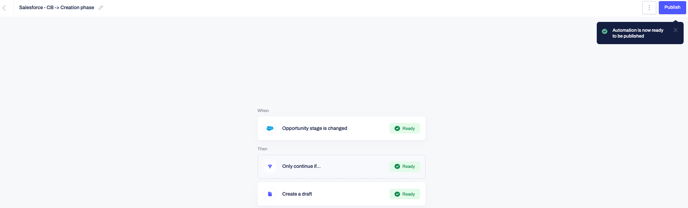
- In this instance, we will use the Opportunity stage is changed:
- Then we need to configure which opportunity stage will trigger the automation flow - you can choose the one which matches your use case, but for this article, we will select Qualification:

- To move on to the next step, just click Save.
How can I add an additional condition to the Salesforce opportunity?
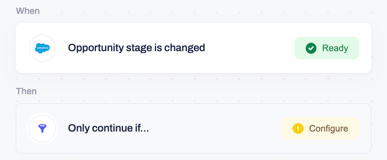
- In the next phase, you can fine-tune your automation by setting up additional conditions which must be met for the action to be executed.
- Select Only continue if from the drop-down list:
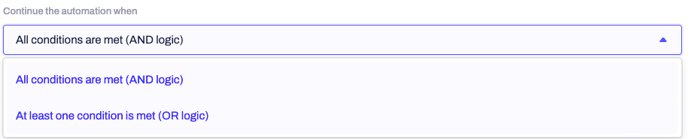
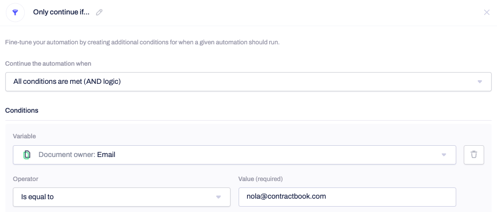
- The logic beneath "Only continue if" is that you can combine different conditions which must be met to continue after the automation event defined under "When" is activated.
- You can choose to add AND logic, which means that all configured conditions need to be met, or OR logic that will be met if at least one of the conditions is true:
- In our example, we add the opportunity's owner email address as a condition - it must be equal to nola@contractbook.com to proceed with the following automation steps:
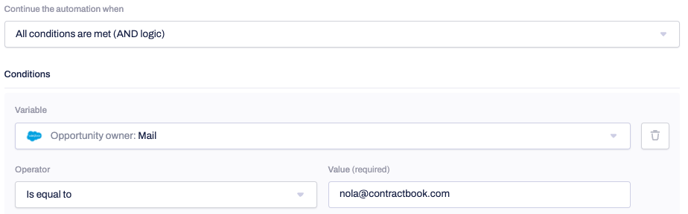
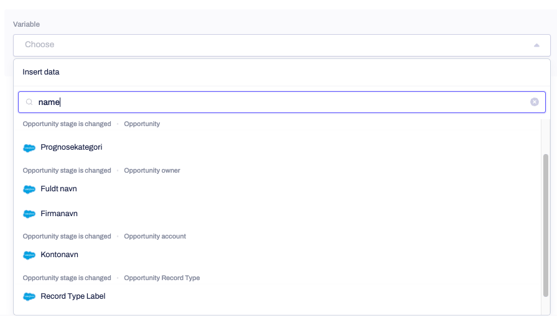
- You can use the search bar under Variable to select any Salesforce variable, assign a conditional logic to it and this way, customize the flow fully as you find fit:
Using Salesforce Opportunity contact list variables:
- In addition to the above type of variables, you can now return the Opportunity contact list variables too.
- This means that you can access all opportunity's contacts and the associated with them properties directly from the Automation Builder:
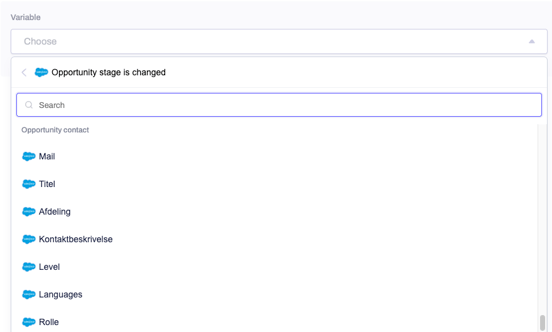
- The Opportunity's contact variables will also be available in all following after the trigger event steps.
- Scroll down to the sections under Variables and select the specific Salesforce contact variable you want to include in the automation step you are configuring.
- Once you complete the Only continue if automation logic with as many conditions as you need, you can move on to the following configuration.
How can I configure the action event?
- We must tell the system what action to take when the trigger event occurs and ensure the defined conditions are met.
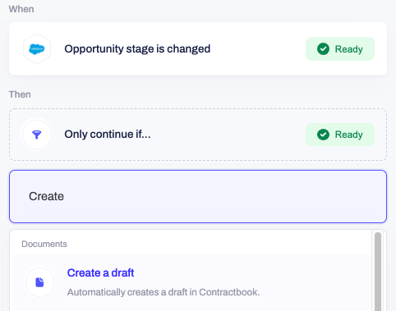
- Click on the small plus icon under the "Then" part of the automation setup and select Create a draft from the drop-down list (the example we are configuring in the article, but you can choose any other action event that matches your use case).
- This will automatically open a new configuration window in the right-hand sidebar:
- Here you can choose the template you want to use to create the new draft:

- Now, three tabs will be available to configure the details of the draft you want to create further.
Who becomes the owner of the new draft once the automation is run?
If a draft is created by the Create draft automation action, the automation creator will be automatically assigned as the owner of the new draft, disregarding if the chosen in the automation trigger event template is one of Contractbook premade templates or a template shared with you instead of one you own yourself.
In case you need to change this generic setup, you can do that by creating an additional automation step Share document right after the Create draft automation step.
In this extra automation step, you can grant any collaborator full edit rights and privileges to send the new draft for signature. They will then have almost the same permissions as the document owner themselves. The only limitation will be that they will not be able to see the Version History of the draft.
How do I use the Details tab?
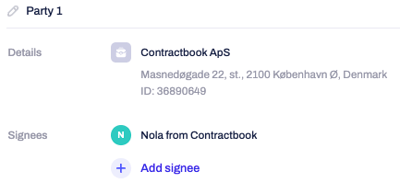
- Use the Details tab of the configuration to start by naming the draft which will be created, then fill out the Party and Signee details:
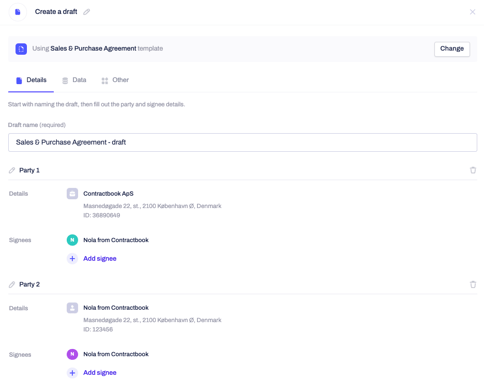
- Any contact information that already exists in the party and signee sections of the template will get auto-populated here, and you can add as many parties (or additional signees to an existing party) as you need:
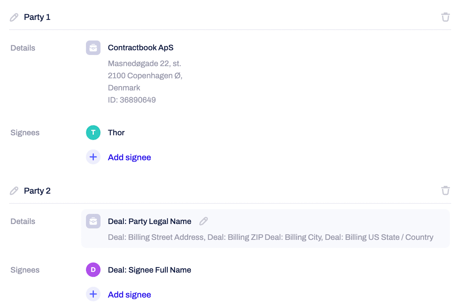
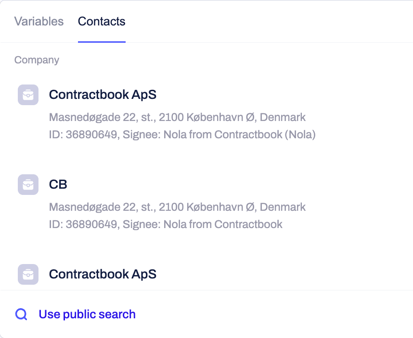
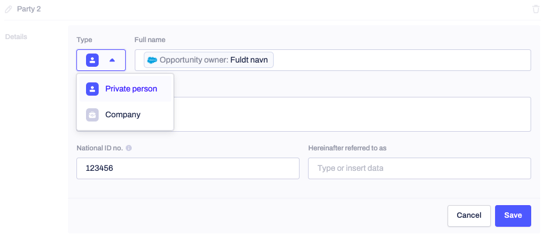
- You can select a private person or company profile type for each party and search for variables from your Salesforce opportunity, type the data in manually, or pick a Contact existing under your Contractbook account.
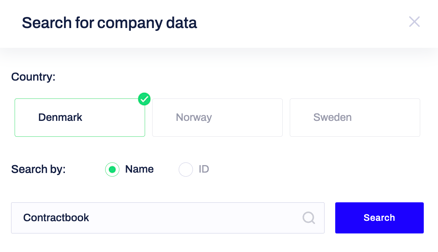
- Under the Company contact profile, there is an additional option to use a public search for your ease:
- This option allows you to auto-populate all details related to a company found by ID or name within Denmark, Sweden, or Norway:
- If you choose to select variables, they will get auto-populated in the respective party field details (Full name, Address, National ID, or Registration Number, Referred to as):
- You can add signees to each party, allowing you to sign the draft with multiple signees from one party.
- In our example, we will only have one signee representing each party:
How do I utilize the Details tab to use Party or Signee variables in my automation?
You can also use any of the pre-existing Party and Signee variables to auto-populate the Party and Signature fields of the automatically created draft.
Another possible use of the variables is to display the names of both Signees directly in the new draft's title, by automatically fetching their properties.
Here is a link to our article that can help you with the needed details of using Party or Signee variables in Contractbook in-app Automation Builder.
How do I use the Data tab?
After you have completed the above configuration, you can move to the Data tab in which you can choose which data points (variables) from Salesforce you would like to add to the body of the contract draft or type them in manually. In our example, we will combine both methods:
Once you have added the data points you wish to auto-populate, click Save.
How do I use the Table tab?
In the following configuration tab, Table, you can enrich your draft with dynamic tables. If there are any dynamic tables in the template you use for the automation setup, you can select and connect them to the relevant Salesforce data source:
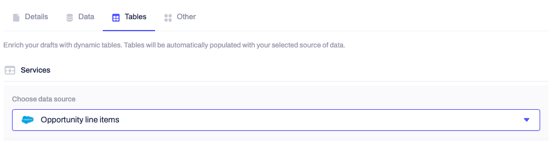
- After the connection is established, you will be able to name and auto-populate the columns of the dynamic table with selected Salesforce opportunity line items:

How do I use the Other tab?
- The final configuration is under the Other tab, which is used to customize your message to the recipient/s by combining text input and any Salesforce variables:
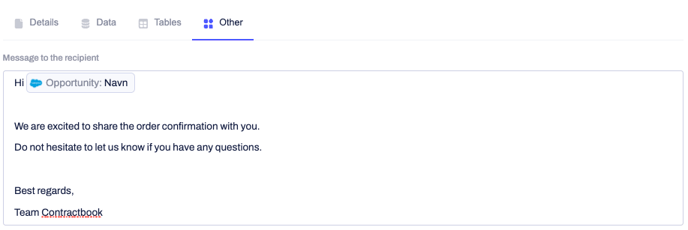
- This is the message which will be sent to all draft recipients.
- Lastly, you can give the automation a name in the upper left-side corner and click on Publish.
- We will now move on to the following automation flow covering the post-signature phase:
How to automatically update an opportunity when a contract is signed?
- With the creation phase set up, we want to ensure the opportunity is also easily accessible in Salesforce and updated as soon as the draft created in the previous automation flow is fully signed.
- Head back to the Automations tab from the main menu and click on Create new.
- The trigger event of the post-signature automation will be Contract is signed. Once you select the option from the drop-down list, a configuration sidebar will extend to the right side of the screen:
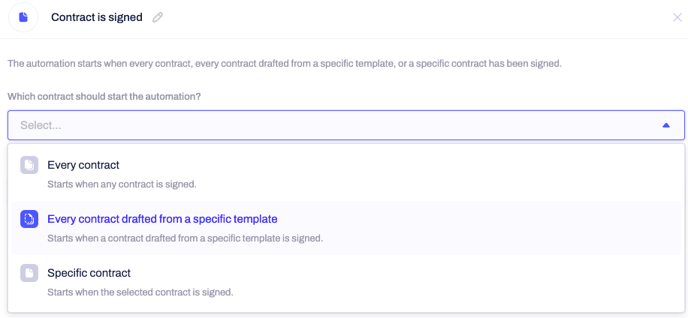
- Use it to select Every contract drafted from a specific template and choose the same template you used in the previous "Creation phase" of the automation setup:

- If you have several templates sharing the same name, just click on the small eye icon, and the document will directly open for your review.
- After choosing the correct file, you can select which signature should start the automation.
- This extra configuration enables you to pick whether the trigger of the automation should be executed after each time a Signee completes a signature added to the contract (Every signature) or only after the last signature that defines the contract as fully signed is completed (Final signature):
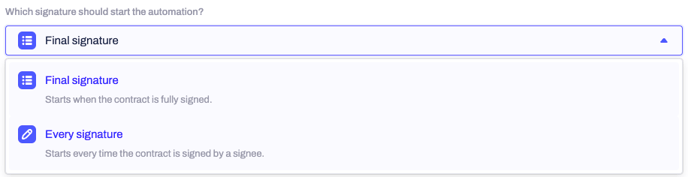
- Use the drop-down list to select the option to define whether updating a Salesforce opportunity should happen after each signature is added to the chosen contract or only after the last one.
- In our use case, we will choose the Final signature option under the automation setup and expect all required signatures to be added first for the signed contract to trigger the Salesforce opportunity update.
- After completing the trigger event configuration, you can confirm all customizations by clicking on Save, and the next step in the automation setup will be displayed.
How can I add an additional condition to the signed via Contractbook contract?
Just as we did before, proceed with Only continue if... condition under Then:
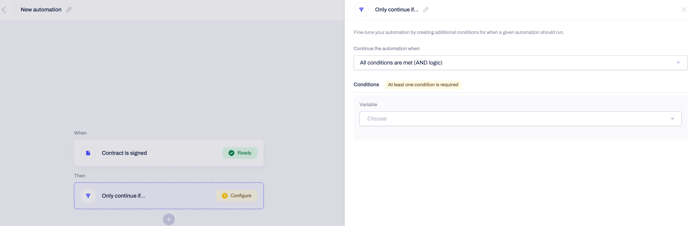
- You can replicate the setup you have defined in the previous automation, but this time by basing it on the template variables:
The last step you need to configure is the post-signature automation action.
Update Salesforce opportunity properties
- Choose Update opportunity from the drop-down list and define how to update selected opportunity properties in Salesforce automatically:
- First, you need to specify which deal you want to update by choosing the corresponding Deal ID from the template's data fields or typing it in manually.
- Then choose which opportunity's properties to update with what value.
- You can add and customize as many properties as you need, but there is a minimum requirement for at least one Salesforce property.
- You can use data fields, party or signee variables or type in the values manually until you map all Salesforce opportunity properties you want to update:
How can I start using my new automation flow?
- Once you have determined all opportunity's properties which the automation will update and set up their values, you can click Save to complete the setup.
- After you have named the new automation (for ease of use) and every step above is done, click Publish in the upper right-hand corner:
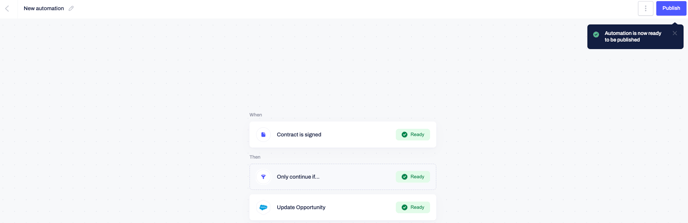
- You have now successfully created your own Contractbook in-app Salesforce automation.
- The phases we configured will help you ease your contract and opportunities management flow and eliminate time and human errors with automatic updates in your contracts and data in your Salesforce system:

If you still need additional information or assistance, reach out to us anytime by contacting our Support Team .