This guide shows how you can set up an automated KYC workflow in Contractbook. The workflow automation consists of a questionnaire that KYC subjects need to fill out, as well as a contract template that is automatically populated with the questionnaire answers and sent for signature.
Guide on how to set up your KYC workflow:
Make sure you have got the following covered:
- Access to Contractbook
- KYC template added to your ‘Template’ section (ask your Customer Success Manager)
- Access to Contractbook Partner Tools
- KYC questionnaire template added to your Partner Tools dashboard (ask your Customer Success Manager)
1. Set up the template
First, set up your KYC contract template in Contractbook so that it contains everything you need for a complete KYC. Mark all variable parts of the text (which depend on the KYC subject's input), convert them into Data fields and give them relevant and recognizable names.
When you have set up all Data fields and your template is ready, head over to Partner Tools.
2. Set up the questionnaire
To be able to populate the KYC template fully after a questionnaire submission, every Data field in your KYC template needs to have a corresponding question that gathers the specific data. So make sure that your questionnaire covers every Data field.
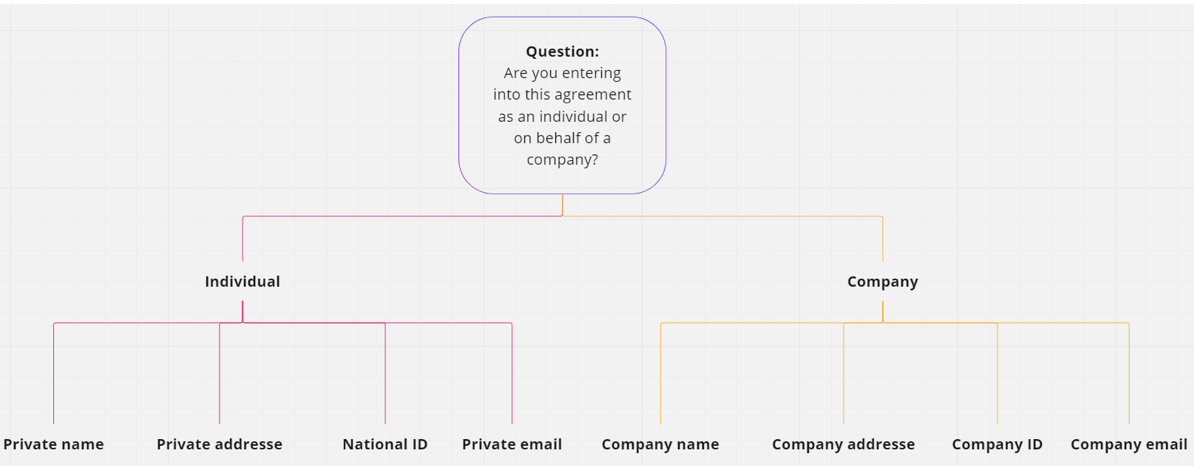
You can build your questionnaires with conditional question logic so that it covers question paths for both individuals or companies:

When you have set up all of your questions, you are ready to connect the questionnaire to your contract template through automation.
3. Set up the automation
Head back to Contractbook and navigate to the ‘Automations’ tab. If your KYC questionnaire contains conditional question logic that distinguishes between individuals and companies, you need to set up two automations. This way you make sure that the correct party details are selected in your contracts.
Let us start with the automation for an Individual:
The first automation (Individual):
- Create new Automation
- When -> Questionnaire is completed
-
-
- Choose your KYC questionnaire
-
-
- Then -> Only continue if...
- Select the question from the Questionnaire where the user answers if it is on behalf of an individual or a company.
- Operator = Is equal to
- Value (required) = {Insert the exact wording}
- An example could be:
Questions: "Are you entering into this agreement as an individual or on behalf of a company?"- Individual
- Company
- The automation will fail if the Value (required) isn’t identical to the chosen option above. So if we set it up for an individual, then we would need to set the value = Individual
- An example could be:
- Create a draft
- Choose the KYC template
- Fill out the party and signee details for your Party
- Insert your own details for Party 1
- Set your generic user to be the Signee
- Fill out the party details for the other Party
- Choose ‘Type’ (Here’s where the filter will come in handy later)
- As this automation is for an individual we choose ‘Private person’
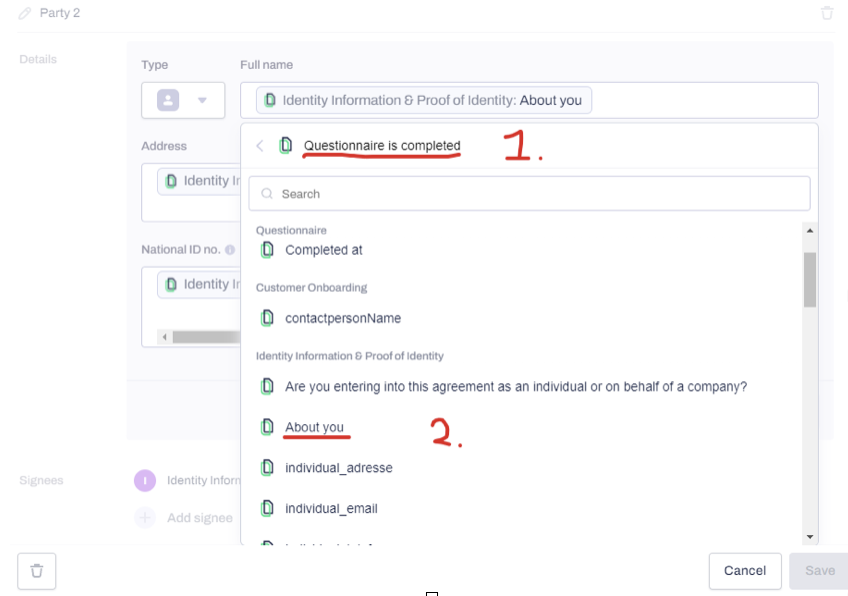
- Click in the white box under ‘Full name’ to fetch data from the Questionnaire
- Click ‘Questionnaire is completed’
- Scroll down and find the question which you want to extract the data from and click:
- Choose ‘Type’ (Here’s where the filter will come in handy later)

-
- Do the same for Address and National ID no.
- Choose what they should be referred to as hereinafter
- Fill out the signee details for the other Party
- Chose the Signature types you want available for the user
- Fetch the full name from the Questionnaire
- Enter what title (if relevant, not mandatory) the user should have
- Fetch the email from the Questionnaire
- Move from the ‘Details’ section to the ‘Data’ section. Here you’ll find all the Data fields listed in the same order as in the template.
- Fetch and connect all the right Data fields with the related question in the Questionnaire.
- Move from the ‘Data’ section to the ‘Attachments’ section.
- You do this by clicking ‘Add attachment’
- Click on the white bar that appears
- Select ‘Questionnaire is completed’ and then select the upload questions from the Questionnaire.
- Add as many attachments here as you have created in the Questionnaire.
- Move from the ‘Attachments’ section to the ‘Other’ section.
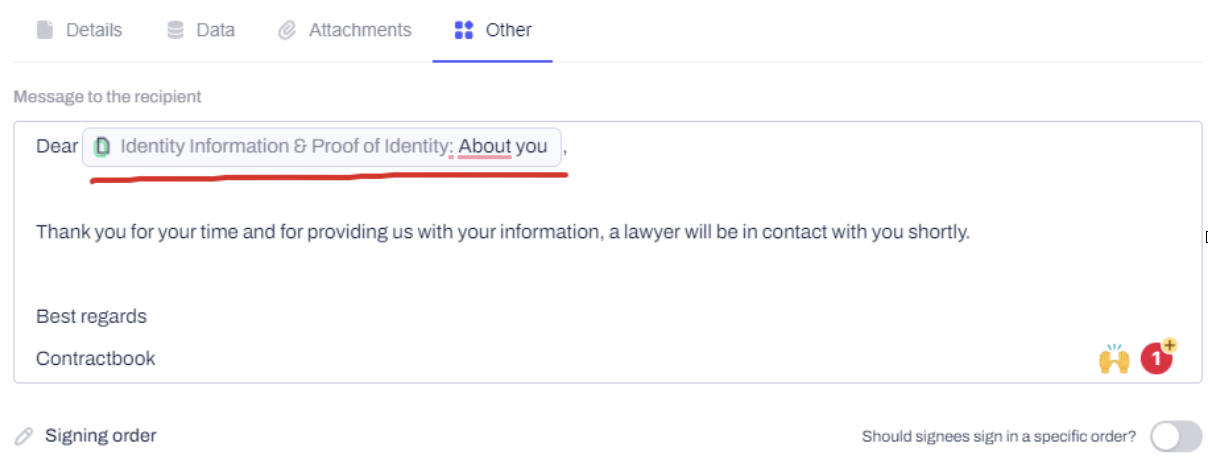
- Here you can write the message the recipient will receive by email.
- N.B. it is possible to fetch data from the Questionnaire as well, so if you want to personalize the message to a specific user, then you can add the data there as well. (See screenshot below):

- Send for signature
This automation step will send the KYC document directly for signature after the user has filled out the Questionnaire.
- Leave Document ID as it is
Note: If you do not want to manually check and sign the KYC’s, you can add a checkmark to "Sign on my behalf automatically if my signature is required"
- If you want to organize all KYC’s then you’re able to set this last automation step up as well.
- Move to a private folder for your own personal folder structure and where to store the KYC.
- Add to a shared folder and shares it in a shared folder.
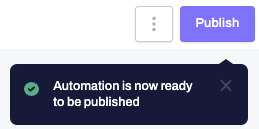
Note: Remember to ‘Publish’ your completed automation:

The second automation (Company)
After finishing up the first automation for Individuals, click on the dots to the right of the automation and select "Duplicate":

Now you just need to make a few adjustments to the duplicated automation. First, change the value of the filter (Then Only continue if...) to = “Company” instead of = “Individual”
After you’ve changed the value continues the ‘Create a draft’ automation step and edit "Type" in the party details for Party 2. Instead of ‘Private Person’ change it to ‘Company’ and adjust the address and company ID.
Finally, make sure the ‘Message to the recipient’ is adjusted if necessary.
Note: Remember to ‘Publish’ your completed automation:

You have now set up your KYC and are ready to run your first test! 🎉 🥳
You will be able to check the activity of your automations by simply clicking on the three dots to the right of the automation ‘Activity’:

This is where you will be able to troubleshoot your automation and see if you need to make any adjustments.
If you need any guidance or help, do not hesitate to reach out to your Customer Success Manager or our Support team.
