Lookup table:
- You can configure a lookup table for any number of variables. If the data matches one of the specified entries, the corresponding value will be used.
This article describes using a lookup table in HubSpot automations to set different criteria for your data sets. It contains the following topics:
- Video tutorial
- Configuring the automation trigger
- Configuring the automation action
- Using the details tab
- Deleting an automation action
- Renaming the automation
- Making changes in a published automation
- Using the automation activity feed
- Testing the automation workflow
- Fixing a failed automation
- Checking a published automation works
How to use a lookup table data to automatically create a contract draft when a HubSpot deal stage is changed?
This article will show you how to automatically transform data in lookup tables when a deal stage in HubSpot is changed.
Here is a short video tutorial of the needed for the automation setup steps, and a step-by-step guide will follow right after:
- Click on Automations tab located in the top menu and then choose My automations from the left-hand sidebar.
- You will see a few predefined automation flows to select and use.
- To create your own, click Create new button from the upper right-hand corner.
How can I configure the trigger event?
- The first thing you need to do is set the trigger event for the automation to be executed.
- In this instance, we will use Deal stage is changed:

- Note: To select this trigger event in the Automation Builder, you must have an established connection to your HubSpot account by following our Contractbook in-app HubSpot integration guide.
- The next thing you need to do is to configure which deal stage will initiate the automation flow - you can choose the one that matches your use case, but for this article, we will select the Contract drafted:

To move on to the next step, just click Save.
How can I delete the trigger in the Automation Builder?
At the very bottom of each trigger configuration window, you have the option to delete only this specific trigger and not the complete automation:
How can I configure the action event?
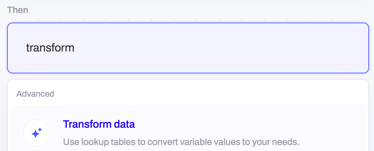
This adjustment step covers the action the automation trigger you have just defined will cause. You can use the search bar to locate the option Transform data:
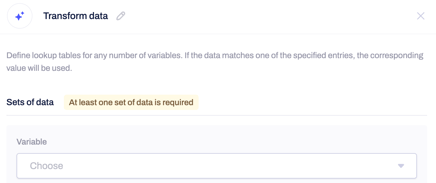
- The details in the action step of the automation configuration will be grouped under the Sets of data section.
- You can use the fields in this window to define lookup tables for any number of variables, and if the data from your trigger source (HubSpot in our example) matches one of the specific entities, the corresponding value will be used in the consequently created contract draft (this is our chosen action but you can use Transform Data together with any other Automation Builder action event):
- You can start by selecting which custom variable (property) from your HubSpot deal stage will be used to transform the data in the lookup table.
- You can use the search bar to locate any of your deal stage variables:

- In our example, we will map out a "Subscription" variable:

- All fields of the lookup table configuration will automatically get displayed, and the next step is to choose a label for the custom variable you have selected.
- You can provide a descriptive name for the transformed variable in this field; it will become available in the subsequent automation actions:
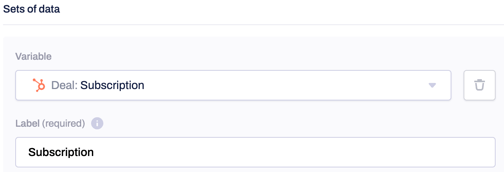
Note: You cannot leave the label field empty:

- The Transform Data action window configuration will map out the lookup table data entries.
- When filling in these fields, the format is "When the value is, then use."
- By default, you will have a single line available to complete, and as you proceed, a new line will be added automatically underneath:

- Note: A multi-type transformation will be available soon (it will allow you, for example, to “apply math function” and “convert date to different format”).
- For now, only one type of transformation is supported in the Automation Builder - transform the variable value using a lookup table.
- You have the option to insert data from the deal stage is changed trigger (HubSpot deal properties) or type it in manually:
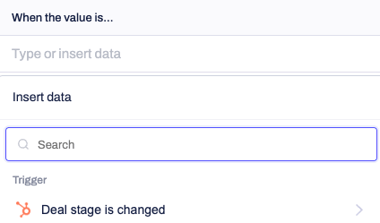
- The purpose of this configuration is to relate a specific value (When the value is) assigned to the custom variable you chose in the previous automation step and give it a particular corresponding value (Use).
- In our example, we will map out by manually typing in two different entries of the lookup table with the following data:
- When the value is: "SUB1" - Use "Subscription 10% off"
- When the value is: "SUB2" - Use "Subscription 20% off"

- The last configuration step is providing a default value for when the data does not match any entry in the lookup table.
Note: If you leave the default value field empty, the initial value will be used:

In our example, we will give the "Subscription" variable a default value of "Subscription 5% off":
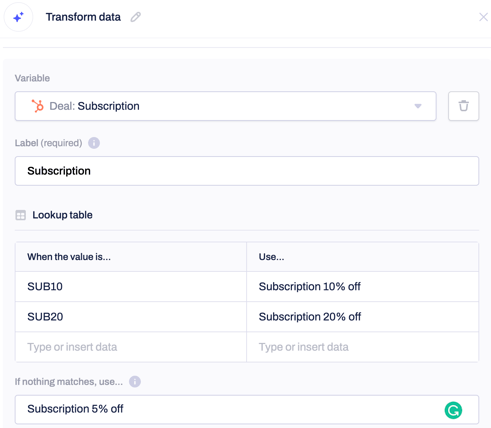
Once you have completed these steps, you can then click on Add a set of data, and you will be able to configure an additional set of lookup table data:
- To complete the Transform Data action setup, click Save to confirm the configuration.
How can I delete a row in the Lookup table?
Once you have added an entry in the lookup table, you can hover over the line and delete only this specific lookup table row:

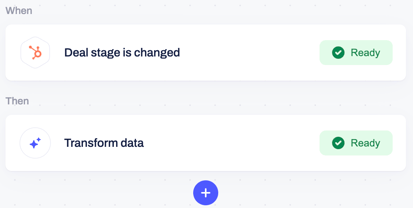
Now you can add a new action that will follow it by clicking on the small plus icon beneath the Transform Data automation step:
You can use the search field to locate the option Create a draft:

Then select the template you want to base the new contract draft on - you can choose one of your own, shared, or one of Contractbook's predefined templates. In our example, we will pick "Sales & Purchase Agreement" from the Contractbook templates library saved as our own template:
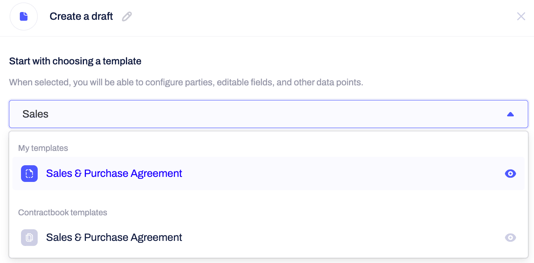
This means that each time a HubSpot deal is moved to the chosen stage, a new contract draft will be automatically generated with the mapped-out lookup table entries available for a customized distribution in the draft's title, body (based on editable fields), attachments, recipients message, Party or Signee details.
How do I use the Details tab?
- The first configuration type is under the Details tab. Under this tab, you can start by naming the draft and then filling out the parties' and signees' details.
- In our example, we will name the new contract draft after the template's name combined with the variable we mapped out in the Transform Data configuration (Subscription):

- You can also use the mapped-out lookup table entries data in the draft's body (Data tab), attachments (Attachments tab), and Recipients' messages (Other tab).
- If you need to learn more about using the remaining tabs under Create a draft configuration window, you can find our article here.
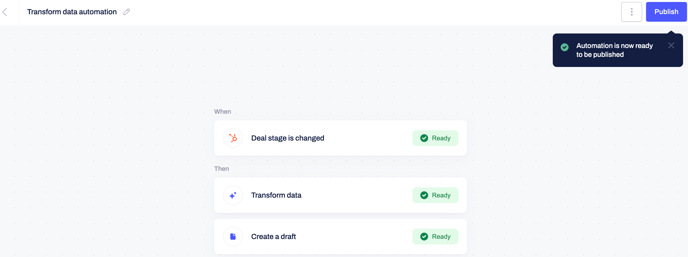
- Once you have finished the steps above, you can click on Save to confirm the configuration of the automation flow and then Publish in the upper right-hand corner.
How can I delete an action in the Automation Builder?
At the bottom of each action configuration window, you have the option to delete only this specific action and not the complete automation:

How can I rename the automation?
- You can always rename the automation and its steps as you find fit by clicking on the small pen icon next to the generic title in the upper left-hand corner.
- In the example we are working with, we will call it "Transform data automation":
How can I make changes to published automation?
- If you need to make any changes to the automation configuration at one point, remember to unpublish the automation first, then make the necessary modifications and click again on Publish to put the workflow into use.
- You can control that by turning the Status toggle bar on or off:

How can I use the Activity feed of my automation?
- If you click on the three grey dots next to the status toggle bar, you can open, rename, duplicate, delete, or see the activity feed of the automation.
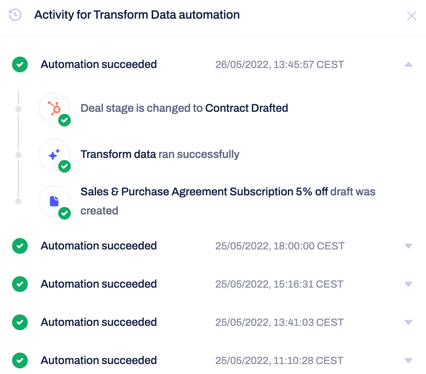
- Remember that the automation must be active (published) for the activities to be available to view. This option allows you full traceability of the automation's usage and flow:

- In the activity sidebar, you will see all the details of when the automation was used and the steps taken before it was triggered.
- Just click on the small arrow next to the date and time to expand the details:
- In addition, you will always be notified in-app in the Notifications at the top navigation bar as soon as any of your automation flows has been executed:
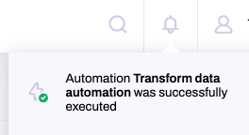
- Note: You can adjust your account's email and in-app notifications under Profile Settings.
How can I test Transform data in Lookup tables automation?
To perform the test, you must change your HubSpot deal to the one chosen in the automation trigger stage. In our example, we need to select the Contract drafted stage:
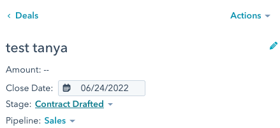
Then, complete all deals' properties, including the custom property you have created in the Automation Builder. In our case, we will assign the following value to the "Subscription" property in HubSpot:

This property value corresponds to the first lookup table row:

- As soon as the deal has been moved to the correct stage that triggers your Transform Data automation and you have chosen a specific value for the custom HubSpot variable used in the automation configuration, you can then go back to Contractbook and check the Notifications under your account:
- The automation status will be listed there as either successful or failed.
How can I fix a failed automation?
- If the automation has failed, you can access the detailed view by clicking on the failed notification in the list.
- In this view, you can identify the reason for the failure by expanding the failure to run details.
- You can then use the information found here to change the automation from the configuration settings.
How can I check the automation runs successfully?
- If your automation has run successfully, you can open the new contract draft by clicking on its name in the activity sidebar. In our case, we can identify that the automation has run successfully by looking at the title of the new draft.
- It matches the name of the template we used as a base for creating it, followed by the value of the lookup table entry we have configured in the automation builder:

- The data will be automatically fetched from the lookup table entry associated with the typed-in custom property value:

Now that you have tested the automation workflow, you are ready to start using it actively and save time by automatically transforming contract data based on lookup table entries.
If you still need additional information or assistance, reach out to us anytime by contacting our Support Team .
