This article describes how to automatically send a new contract for signature once the task due date is reached or the task is completed. It contains the following topics:
- Using the task due date is reached automation trigger
- Sending a contract for signatures when a task due date is reached
- Setting up the automation
- Configuring the automation trigger
- Understanding the automation execusion
- Deleting an automation trigger
- Configuring the automation action
- Deleting an automation action
- Renaming the automation
- Making changes to a published automation
- Using the automation activity feed
- Testing the automation workflow
- Fixing a failed automation
- Checking a successfully run automation
How does the trigger event work successfully?
The “Task due date is reached” trigger will start the automation once the selected by you task’s due date passes. For example, if you have a Renewal task with a due date on 15 Aug and you have automation using this trigger for Renewal tasks, the automation will run on 15 Aug in the morning.
Important:
- Automations with the trigger event "Task due date is reached" will be executed at 09:00 UTC.
- Make sure to take this into account when using the feature.
All tasks with a due date in the past, or those tasks created after 9:00 UTC with a due date matching the current date, will not trigger the automation successfully.
In addition, for successful automation execution, you must have access to the document chosen in the Automation Builder in one of the following ways:
- The document is shared with you in a shared folder or by direct Share document option
- The template selected in the Automation configuration is shared with you in a Space
- You own the document which is selected in the setup
Remember that you can create centralized automation from the team owner's account of the team you belong to, and this automation trigger will be used across all team members' accounts.
And finally, it requires you to be either a follower or an assignee of the task created in the document, for the automation to run successfully from your account.
How to automatically send a contract for signature as soon as a renewal task due date is reached?
With the help of our in-app automation builder, you can create a new draft and send a contract for signature automatically as soon as a specific set of renewal tasks assigned to any document has reached its due date.
Depending on your use case, you can choose any other type of task and customize the entire automation as it fits you.
Here is a short video tutorial of the needed automation setup steps, and a step-by-step guide will follow right after:
How to set up a "Task due date is reached" automation with Contractbook?
- Click on Automations tab from the main menu and then on the blue button Create new at the upper right-hand corner.
- You will be redirected to a pop-up window where you can customize the automation's setup. To specify when the automation shall start, select a Task due date is reached option from the drop-down menu:

- This will automatically open a configuration window to the right in which you can define which contract and type of task should start the automation.
How can I configure the trigger event?
- The first thing you need to do is set the trigger event for the automation to be executed.
- You must pick which document contains the tasks that should start the automation.
- You can assign the trigger to any document, any document drafted from a specific template, or only a particular document:
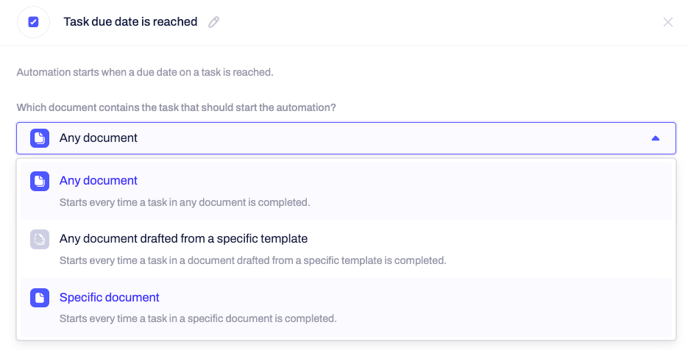
To configure the trigger, you need to specify three main configuration options in the Automation Builder:
- Which document contains the task that should start the automation?
Similar to other contract-related triggers, you can select any relevant document, those documents created from a specific template or only a specific document you want to use for the automation. - Which task type should start the automation? With this option, you can select the type of task with reached due date, which must be present in the selected document for the automation to run.
-
Any task
-
Approval
-
Review
-
Update
-
Inform
-
Milestone
-
Obligation
-
Renewal
-
Expiration
-
Custom task
-
- Start automation on completed tasks - this checkbox controls whether the automation should run when the task is marked as done (if checked, the automation will only run on completed tasks).

When is the automation executed?
- Suppose you choose to start the automation also on completed tasks. In that case, all those tasks marked as completed before their due date were reached will also be considered when running the automation.
- On the other side, if this field is not checked and the task is completed before its due date is reached, the automation for that task will not be executed at all.
- Once you have customized the trigger event, you can confirm by clicking on Save, and the next step in the automation setup will be displayed.
How can I delete the trigger in the Automation Builder?
At the bottom of each trigger configuration window, you have the option to delete only this specific trigger and not the complete automation:
How can I configure the action event?
- This adjustment step covers the action the automation trigger you have just defined will generate.
- You can use the search bar to locate the option which suits your use case. You can read more about using our in-app automation Builder here.
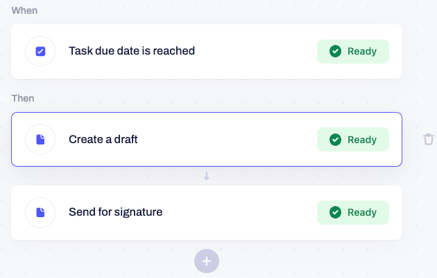
- For the use of our guidance, we will select Create a draft and Send for signature :
- A new configuration window will appear on the right side of the screen.
- Here you can customize the properties of the contract draft and the final contract, which will be automatically sent for signature once the automation runs successfully.
How can I configure the "Send for signature" action?
You can read more about this configuration step here.
Once you have everything done, click on Save to confirm the configuration of the Task is done automation and then Publish in the upper right-hand corner.
How can I delete an action in the Automation Builder?
At the very bottom of each action configuration window, you have the option to delete only this specific action and not the complete automation:
How can I rename the automation?
You can always rename the automation and its configuration steps as you find fit by clicking on the small pen icon next to the generic title in the upper left-hand corner. In the example we are working with, we will call it "Renewal of purchase agreements":

How can I make changes to published automation?
- If at one point you need to make any changes to the already published automation flow, remember to unpublish it first, then make the necessary configuration edits and click again on Publish to put the flow into practice and save all the changes.
- You can control that by turning the Status toggle bar on or off:

How can I use the Activity feed of my automation?
- If you click on the three grey dots next to the status toggle bar, you will be able to open, rename, duplicate, delete, or see the activity feed of the automation:

- The Activity overview enables you full traceability of the automation's usage and flow:
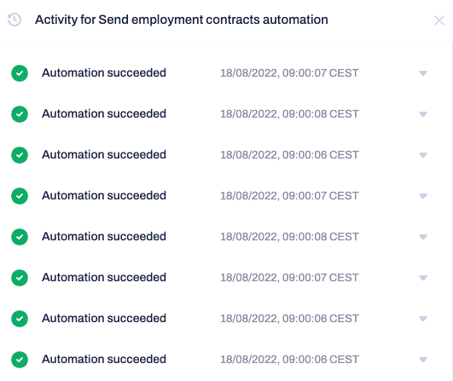
- In the activity sidebar, you will see all the details of when the automation was used and the steps taken before it was triggered. Just click on the small arrow next to the date and time to expand the details:
- In addition, you will always be notified in-app in the Notifications at the top navigation bar as soon as any of your automation flows has been executed:
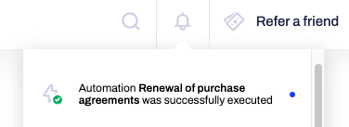
Note: You can adjust your account's email and in-app notifications under Profile Settings.
How can I test the "Task due date is reached" automation?
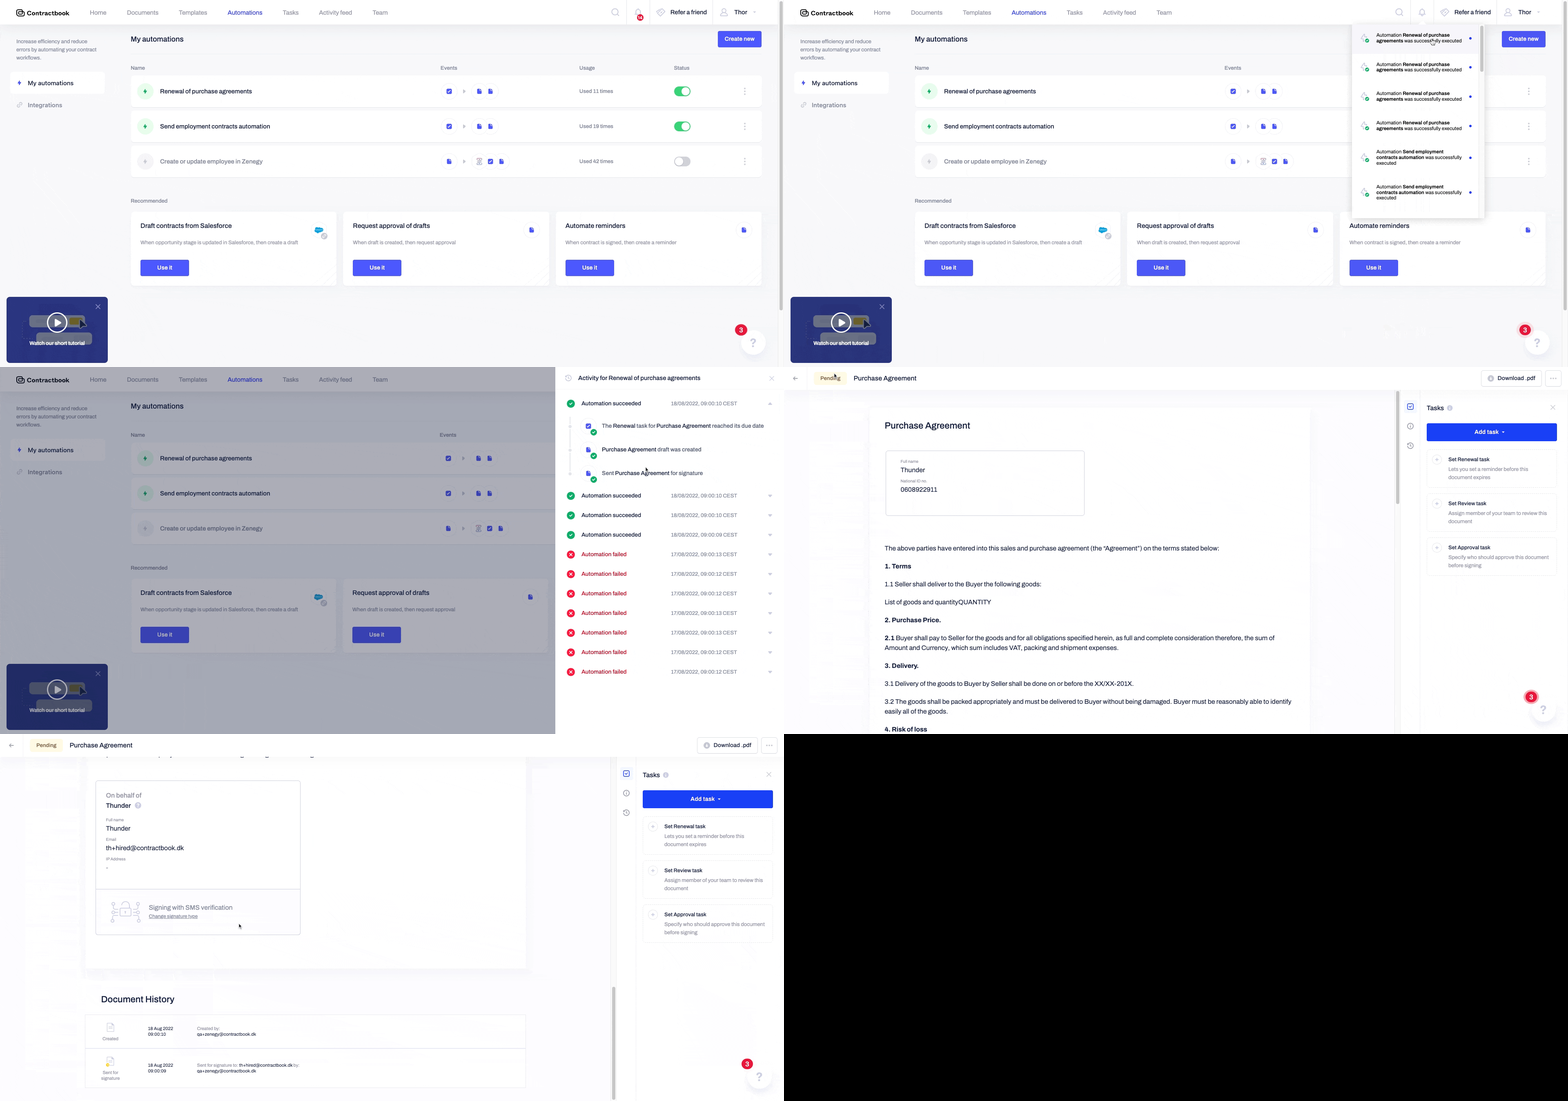
- To perform the test, you can configure a new Renewal task (or any other task you have chosen to trigger the automation) in the selected automation setup document. You can use any state of a document: draft, pending, or fully signed contract.
- You can easily do that by using the task sidebar.
- As soon as the due date of the new task is reached, you can go back to your documents overview and check the notifications under your account. The automation status will be listed there as either successful or failed.
- Note: All tasks in your "due date is reached" automation will be checked at 9:00 UTC time. Any notifications will be available under your profile after this hour for the current date, which matches the task's due date.
How can I fix a failed automation?
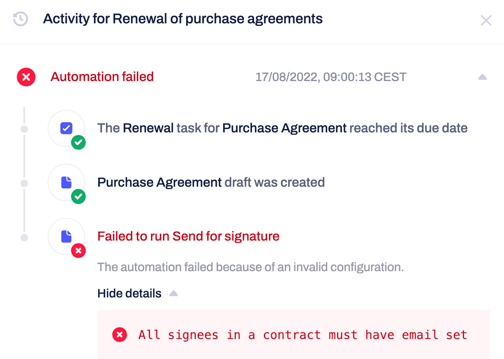
If the automation fails, you can access the detailed view by clicking on the failed notification in the list under your profile notifications.
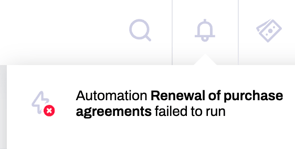
- In this view, you can identify the reason for the failure by expanding the failure to run details.
- You can then use the information found here to change the "Task due date is reached" from the trigger configuration settings.
- In the example above, we must change the contact details defined in the automation setup.
- All signees of the new contract are automatically fetched from the new draft created in the previous step.
- If the signee's email address needs to be added to the new draft we create, sending the contract draft for signature will not be possible following the next step in the automated workflow.
- Once we make sure to go back and change that, the automation will run successfully.
The automation can run as failed if, for example:
- The document you have selected in the automation builder is not shared with you: if you have lost access to the document on which the trigger event is based, you will not be allowed to run the automation successfully.
- The due date of the task is in the past/future: all trigger events for "Task due date is reached" automation will be checked in the morning, at 9:00 UTC, and you can, therefore, not use the configuration successfully with due dates assigned in the past or coming up in the future. All tasks with a due date reached exactly today will evoke the automation being executed until 9:00 UTC.
- You are not a follower or assignee of the task: as a general rule of using this automation trigger, you must be either a follower or an assignee. If this condition is not met, you will not experience the automation being successful.
Note: To perform the automation action step of sending the contract for signature, at least one additional signee must be added to the required signature sequence in addition to yourself.
You can always use any party and signee variables in this configuration window.
The additional contract signees you have identified will also be the users to whom the contract will be sent once the trigger event has occurred and the automation has run.
How can I check the automation runs successfully?
- If your automation flow runs successfully, you can open the new Pending contract created from the template you have defined in the automation flow.
- The contract should be automatically sent for signature to the chosen by you signees with the same properties as the ones you have selected from under the configuration of your automation.
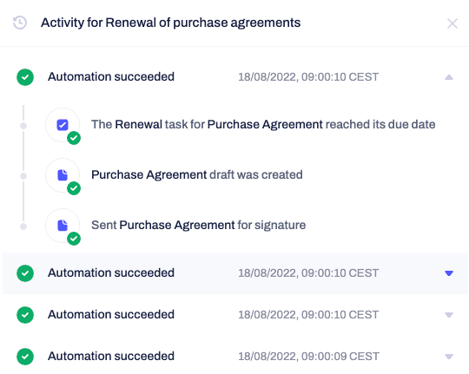
- Depending on your customization, it will either be already signed by you or not.
- We have selected the option of signing the contract on our behalf before sending it further.
Now that you have tested the automation workflow, you can use it actively and save time by automating exclusive workflows based on reached tasks' due dates assigned to a specific document. With the in-app automation builder, you ensure that you always meet that deadline.
If you want to use the automation as a centralized workflow that runs across all team members' accounts, you can read this article for detailed guidance.
If you need additional information or assistance, contact us anytime via our Support Chat or email .
