
The editor is our text editing and formatting tool that allows you to create the body of your contracts. It includes different features, some of which are exclusive to Contractbook.
What options for contract editing can I use?
-
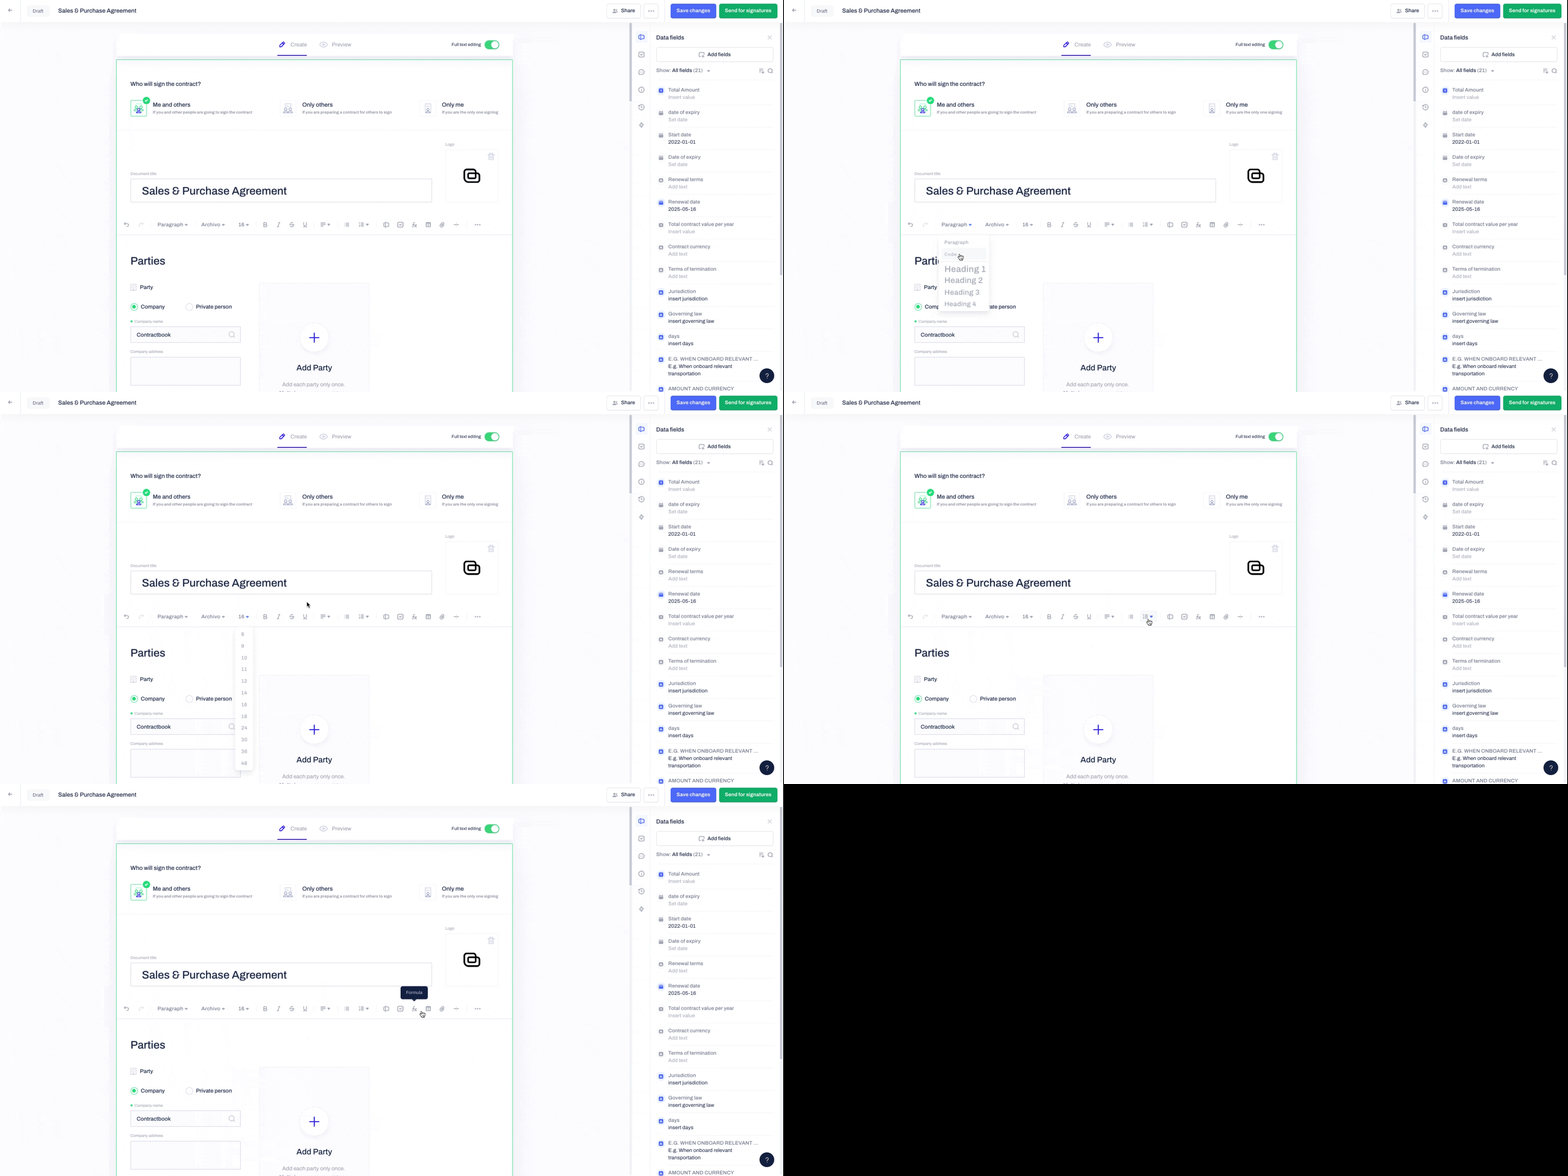
Undo/redo
-
Text style
-
Font type and size
-
Bold, italic, underline & strikethrough
-
Text alignment
-
Lists
-
Bullet list
-
Ordered list
-
-
Data and metadata fields
-
Formula
-
Table
-
Checkbox
-
Attachments
-
Horizontal line
-
More options
Undo/redo
- These two buttons allow you to instantly undo your last edit or redo and return to the instance before the change.
- Alternatively, you can use Ctrl+Z or Command+Z (Mac) keyboard command.
Text style
Three options for text styling are available here:
- Paragraph: designed in general for body text
- Code: intended for any programming language or piece of code
- Four headline styles
Font type and size
You can choose the font you like and apply size to it.
Bold, italic, strikethrough & underline
To apply any of these options to a block of your text, either press the button in the Editor corresponding to the style or use the keyboard shortcuts:
- Bold: Ctrl/Cmd + B
- Italic: Ctrl/Cmd + I
- Strikethrough: Ctrl/Cmd + D
- Underline: Ctrl/Cmd + U
Text alignment
It is naturally possible to align text to the left, center, or right.
Lists
Contractbook editor has two listing options:
- Ordered list
- Bullet-point list
Both work in the same way:
- Press Enter for the next list item
- Press Tab to move in (for example, from 1 to 1.1)
- Press Tab + Shift to move out (for example, from 1.1 to 1)
- Press Shift + Enter to add extra space between points without creating a new one
Read more about using lists in your documents here.
Data fields and metadata fields
These fields are the key to Contractbook power and will enable you and your collaborators to leverage the best value of all your agreements.
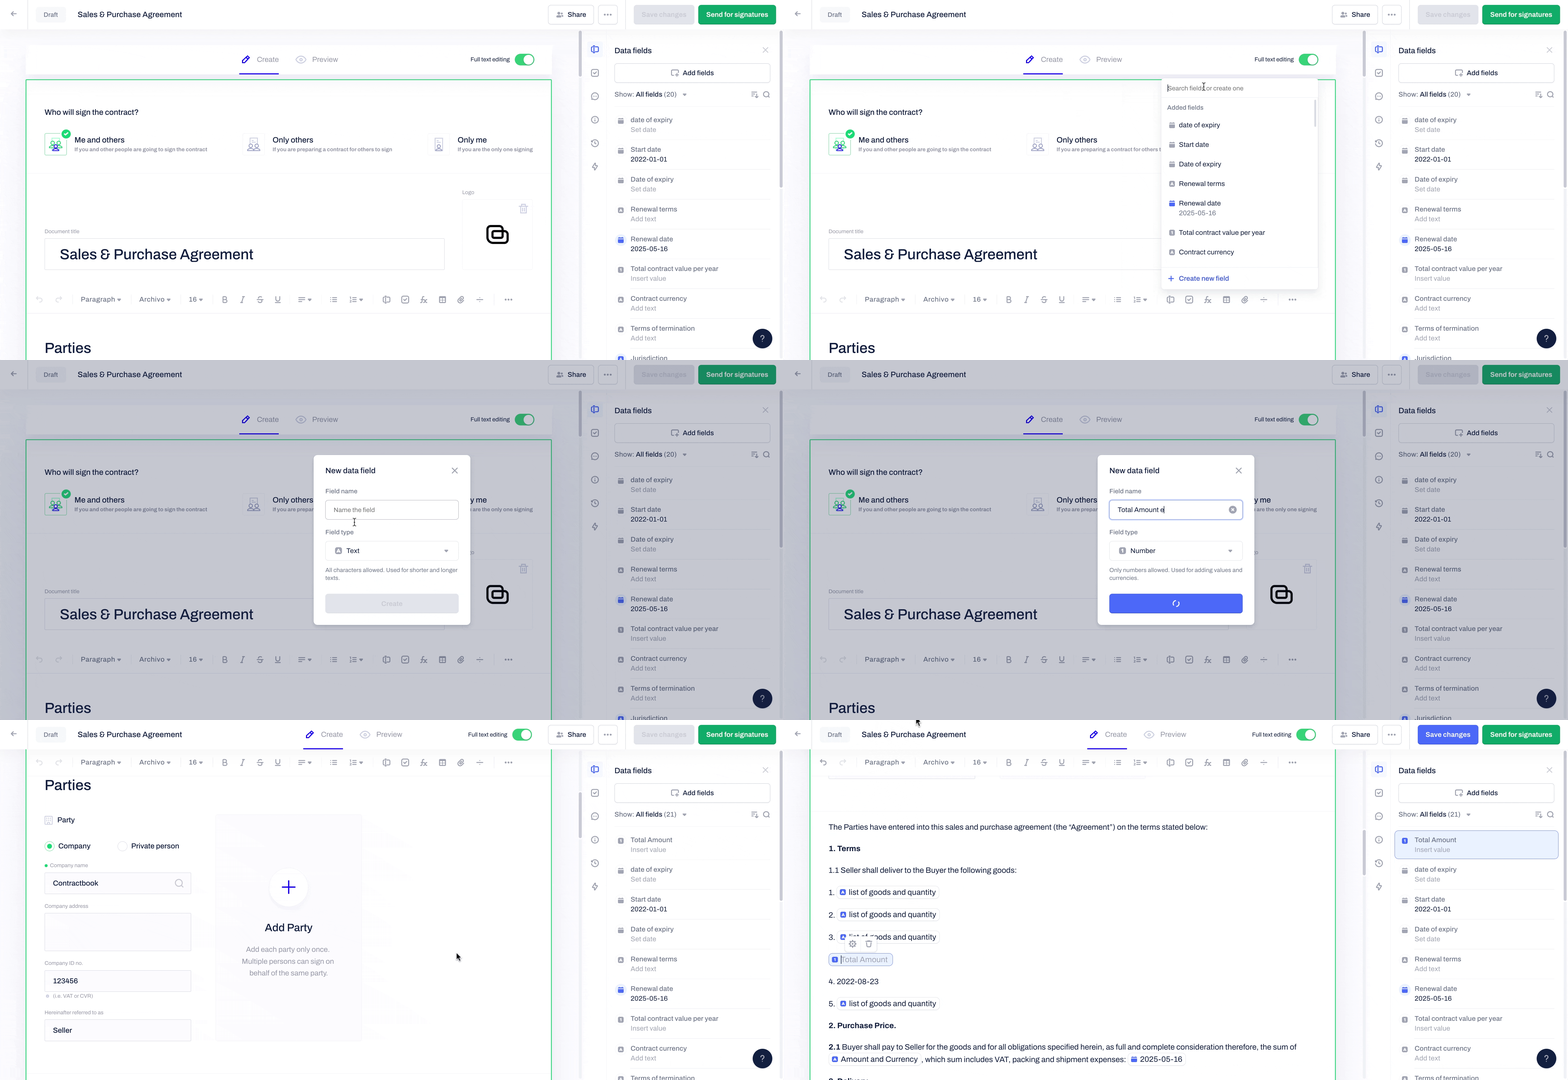
- You can click on the small "Add field" icon in the editor's menu, which will lead you to the same functionality as the "Add fields" button in the righthand data fields sidebar:

- Once you have clicked on the "Add field" action icon, you will be able to Search for already existing or Create a new field
- Both existing and created from the action menu fields will then be available in the data fields sidebar and can be dragged and dropped in the body of your document:
Learn how to use data fields here.
Formula
- The Formula icon in Contractbook editor provides you with a simple spreadsheet function.
- We recommend using the "transform data" automation action for more complex and dynamic spreadsheet formulas.
- To create a formula field, press the formula icon and assign the following attributes to it:
- Name, Format, Value, or Formula:
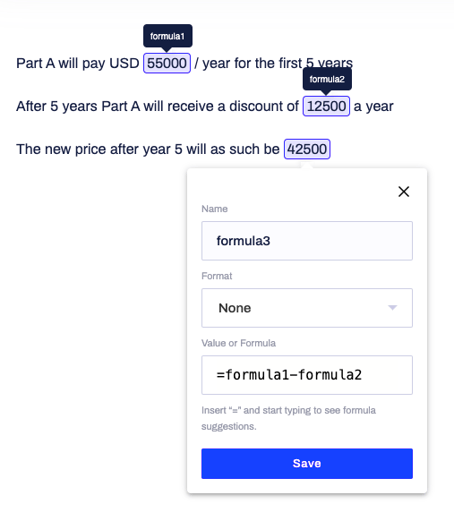
You can learn here how to use formulas to execute calculations with any variable data in your contracts.
Table
- Tables can be created in drafts and templates.
You can read more about all tables' formatting features in your documents here.
Checkbox
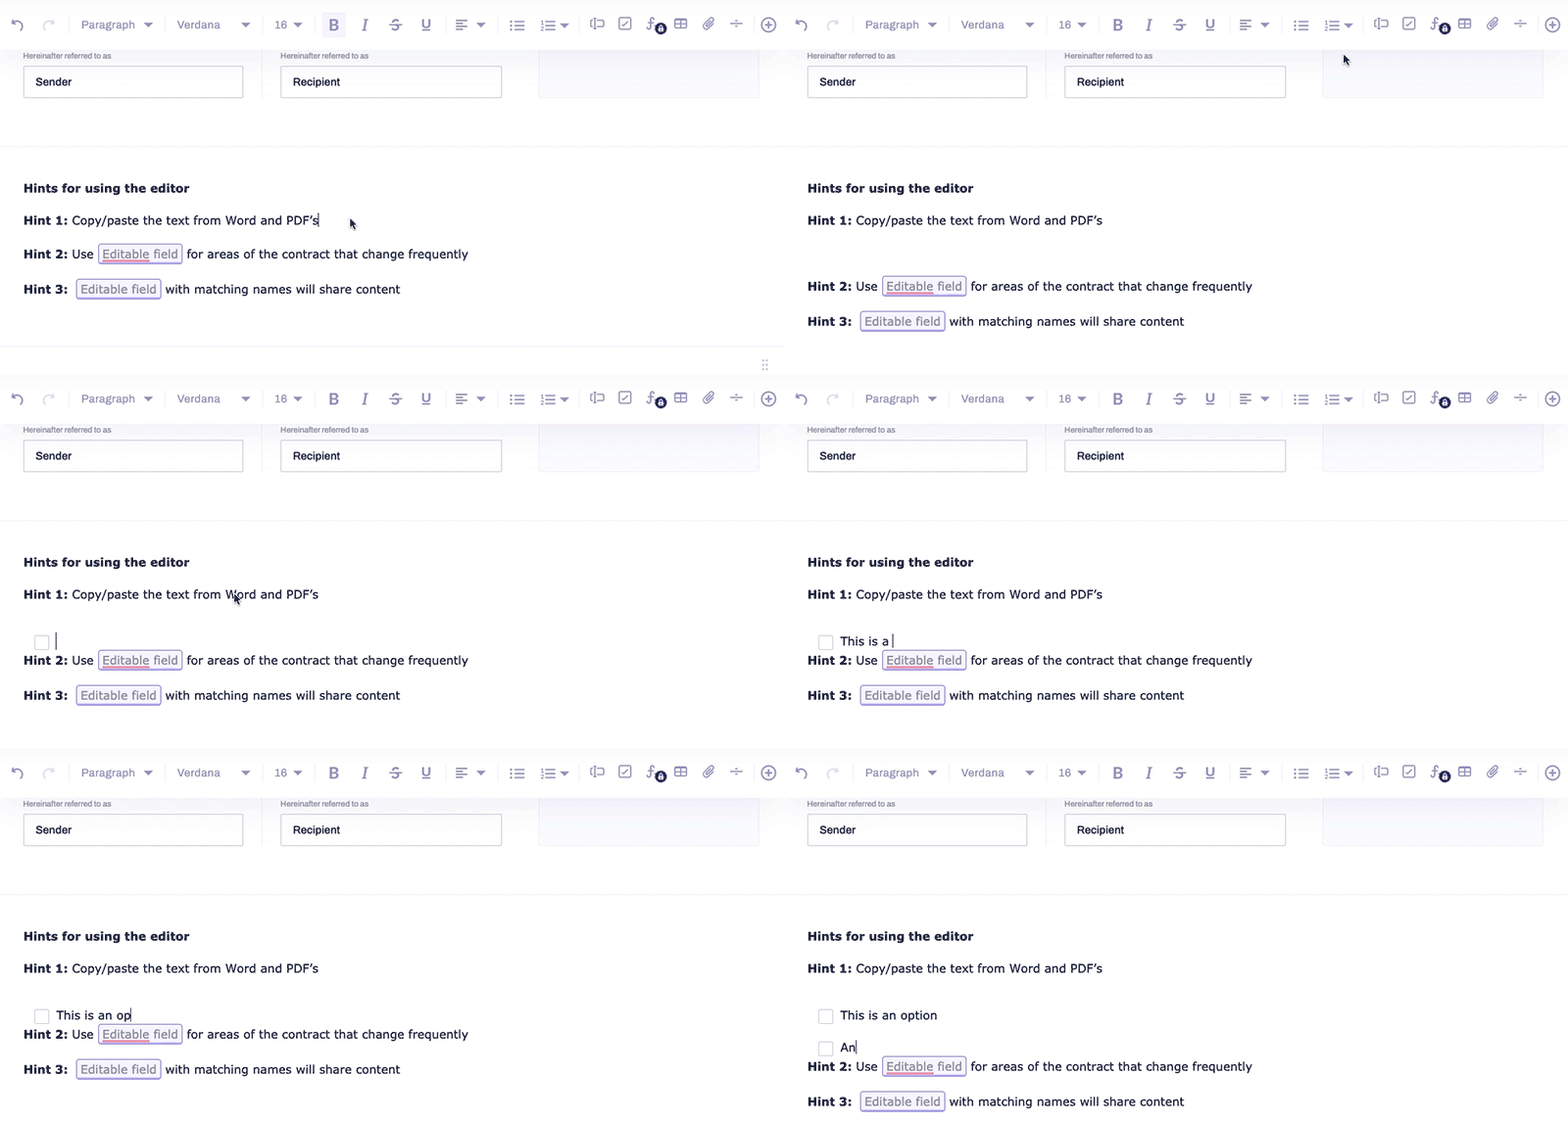
Using this icon, you can add checkboxes to your contracts.
Attachments
- Using this icon, you can add attachments within the body text of your contract. The following formats are accepted: .pdf, .jpg, .png, .doc, and .docx.
- All dates in your attachments will be scanned and automatically extracted for easy Reminder Tasks and Automations creation.
- Read more about the use of attachments in your Contractbook documents here.
Can I move the attachment box above the "message to recipients"?
- Moving the “add attachments” column above the "message to the recipients" box is impossible.
- Instead, you can use “embedded attachments” inside the editor, which allow you to attach content in the body of the draft.
- You can find it by clicking on the paperclip icon in the editor.
Horizontal line
This will create a page-wide, horizontal line that can separate pieces of content from each other.
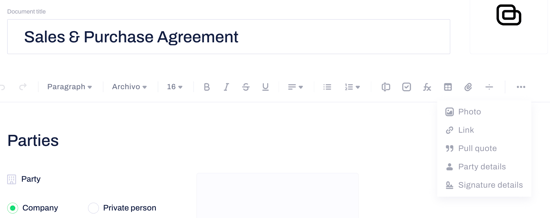
More options
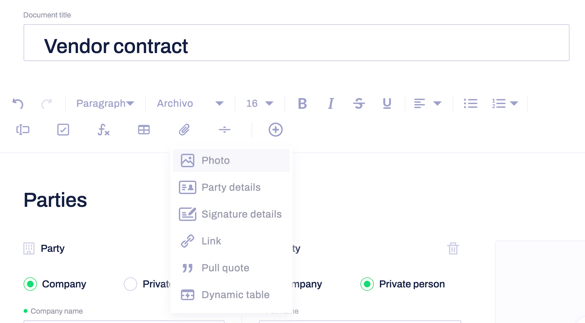
- Photo: Add an image to your document. Here are the steps for deleting images.
- Party details: This field is automatically added to the top section of all Contractbook documents, and here you can add the details of the parties.
- This field is a mandatory one but can be moved to different locations. You cannot send a contract with removed party fields.
- Signature details: This field is automatically added to the bottom of all Contractbook documents, and here you can add the signee details.
- This field is also mandatory but can be moved around in your document.
- Link: This feature will allow you to add a hyperlink to a webpage you assign to it.
- Pull quote: Pull quote allows you to highlight a specific text by indenting it.
- Dynamic table: This table will get populated with data from your automation and automatically adjust the number of rows to fit the data.
- This feature is significant when dealing with sales contracts that often include various products.
- Read more about its application in our main article here and Contractbook in-app HubSpot integrations.
-
You can use dynamic tables to map contract data for any other tool you integrate with Contractbook.
- This feature is significant when dealing with sales contracts that often include various products.
If you want to see what your contract will look like for the recipients, enter the Preview mode of your draft and test all the main app editor's features.
After customizing the contents, you can further customize the entire signature process as it fits best.
If you still need additional information or assistance, reach out to us at any time by contacting our Support Team.
