
This article describes how to automatically create a new renewal reminder on a signed contract. It contains the following topics:
- Video tutorial
- Setting up the automation trigger
- Setting up the automation action
- Using parties and signees variables
- Setting up the reminder due date
- Renaming the automation
- Making changes to a published automation
- Deleting the action event
- Using the automation activity feed
- Testing the automation workflow
- Fixing a failed automation
- Checking the automation workflow
How to automatically create a reminder as soon as the contract is signed?
With the help of the in-app automation builder, you can now customize the entire renewal flow for all contracts generated from a specific template.
Here is a short video tutorial on the automation setup:
Click on Automations tab from the main menu and then on the blue button Create new at the upper right-hand corner.
How can I configure the trigger event?
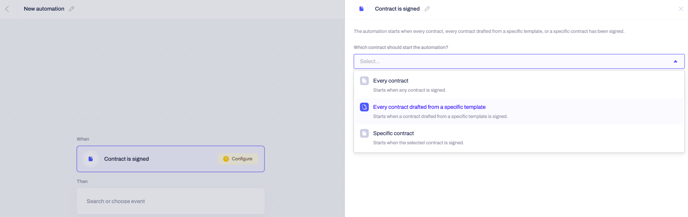
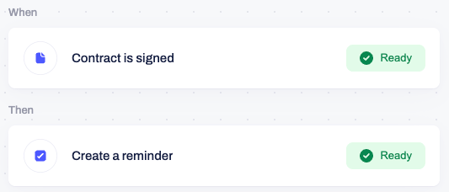
- You will be redirected to a pop-up window where you can customize the automation's setup. To begin with, select the Contract is signed trigger from the drop-down menu. This will automatically open a configuration window to the right in which you can define which contract should start the automation.
- You can assign the trigger to every contract, only contracts drafted from a specific template or a particular contract.
- For the most efficient automation flow, we recommend using Every contract drafted from a specific template.
- This will allow you to automatically assign a new approval task to the relevant assignee each time you have signed a contract from a specific template by turning it into a draft first:
- After selecting one of the three options, you can use the search bar to find the contract, draft, or template you want to base the automation flow on by name.
- If several documents share the same name, you can click on the small eye icon to directly open the particular document.
- After choosing the correct file, you can proceed with choosing which signature should start the automation.
- This extra configuration enables you to pick whether the trigger of the automation should be executed after each time a signee completes a signature added to the contract (Every signature) or only after the last signature that defines the contract as fully signed is completed (Final signature):
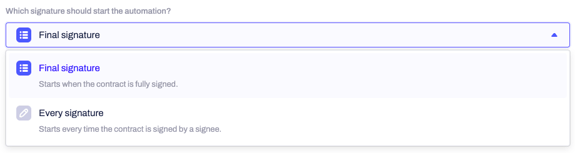
- Use the drop-down list to select the option to define whether adding the reminder task to the signed contract should happen after each signature or only after the last one.
- In our use case, we will choose the final signature option under the automation setup and expect all required signatures to be added first for the signed contract to be automatically assigned with the configured reminder task:

- After completing the trigger event configuration, you can confirm all customizations by clicking on Save, and the next step in the automation setup will be displayed.
How can I configure the action event?
- This step covers the action the automation trigger you have defined will generate.
- You can use the search bar to locate the option Create a reminder:
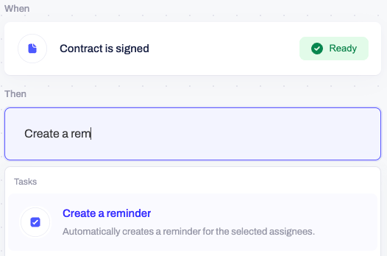
- A new configuration window will appear on the right side of the screen.
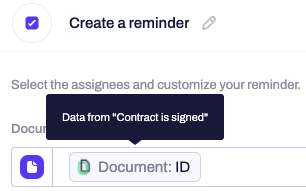
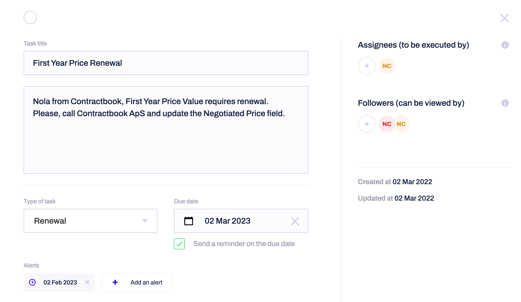
- Here you will be able to customize the properties of the reminder task by defining assignees, followers, title, and description of the task, due date, and any additional reminders:
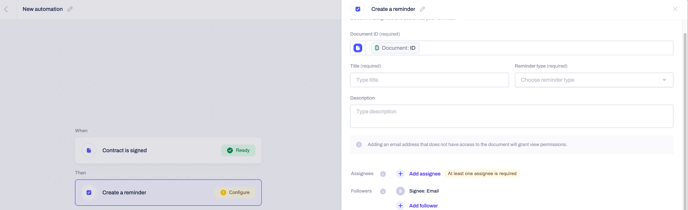
- The first detail in the automation configuration's action step is the template's Document ID, which will be used to run the automation.
- It will be automatically fetched and available under the required field:
- The following configuration steps allow you to customize the entire reminder in depth by writing a title, choosing a reminder type (Milestone, Renewal, Obligation, Expiration), and adding a description for its execution by combining text input and data points from your template.
- You can type in and search for any variable included in the signed contract as a data source and customize the details in this configuration step as you find fit.
- For the example we are showcasing in the article, we have configured the following task to be applied to each "Vendor contract" signed from the template with the same name:
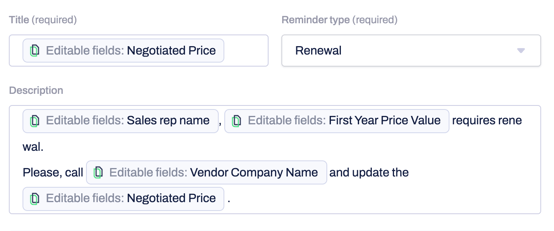
- This will automatically create a renewal reminder task on each signed "Vendor contract" and inform the sales representative that the price negotiated for the first year of the signed agreement must be renewed.
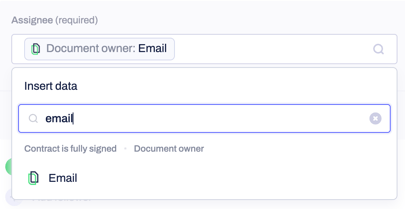
- In the following configuration step, you can invite assignees and followers by email or by searching for a data point associated with them on a contract level. In this case, we will use the email address of the document owner to identify the assignee:
How do I utilize the details tab to use party or signee variables in my automation?
- Note: You can always use any party or signee variable when adding variables to the title, description, assignees, or followers of your new custom task.
- This can deliver essential details to the task's stakeholders fetched directly from the associated with any Signee information.
Can I use a date from the document as the task's due date?
- You can choose manual or based on automation variable and choose any data field with date type as the due date of the automatically created renewal task.
- You can then select to use this date or set a specific offset.
- Usually, approval tasks will use the execution time as a due date, while renewal tasks will be based on a data point in the contract.
Next, in the next block of the task configuration window, you can set a due date for its completion. There are two available options for the date type in the drop-down menu:
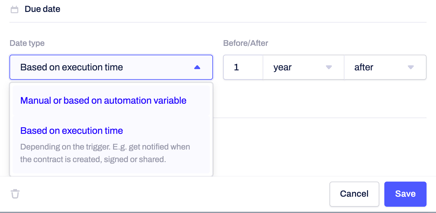
- In the example we are configuring, we will use the second option of a date type: based on execution time which determines the moment the contract has been signed.
- By adding a year after the execution time, we ensure the due date of the renewal reminder is automatically set to 12 months after the contract has been signed.
- The last renewal task property you will be allowed to configure will be the additional alerts reminding you of the renewal.
- The date type can be again based on a due date or an automation variable. You can set as many alerts as needed, such as our example, which includes two notifications based on the due date:
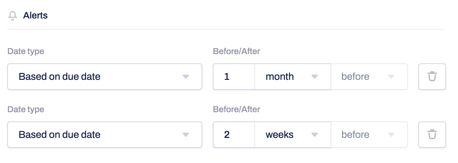
- All attributes dictating how the alerts will be run are entirely customizable.
- Once you have everything done, click on Save to confirm the configuration of the reminder and then Publish in the upper right-hand corner.
How can I rename the automation?
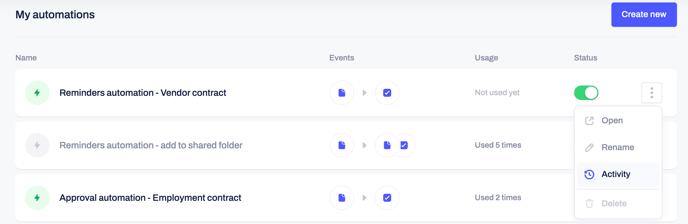
- You can always rename the automation and its steps as you find fit by clicking on the small pen icon next to the generic title in the upper left-hand corner. In the example we are working with, we will call it "Reminders automation - Vendor contract":
How can I make changes to published automation?
- Note: If you need to make any changes to the automation flow at one point, remember to unpublish it first, then make the necessary edits and click again on Publish to put the flow into practice.
- You can control that by turning the Status toggle bar on or off:

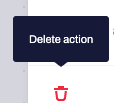
How can I delete action in the automation Builder?
At the very bottom of each action configuration window, you have the option to delete only this specific action and not the complete automation:
How can I use the activity feed of my automation?
- If you click on the three grey dots next to the status toggle bar, you can open, rename, delete, or see the activity feed of the automation.
- Remember that the automation must be active (published) for the activities to be available to you.
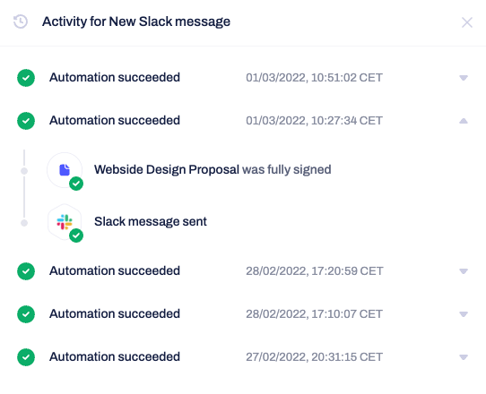
- This option allows you full traceability of the automation's usage and flow:
- In the activity sidebar, you can see all the details of when the automation was used and the steps taken before it was triggered.
- Just click on the small arrow next to the date and time to expand the details:
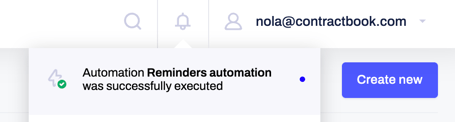
- In addition, you will always be notified in-app in the notifications at the top navigation bar as soon as any of your automation flows has been executed:
Note: You can adjust your account's email and in-app notifications under profile settings.
How can I test Contractbook reminders automation?
- You can add yourself as a signee, save the template as a new draft, turn it into a contract by sending it to yourself, and sign it.
- Remember to choose Only me as the signature method at the draft's top.
- You can then fully sign the draft only by adding your signature.
- As soon as the contract has been signed, go to your documents overview and check the notifications under your account.
- The automation status will be listed there as either successful or failed.
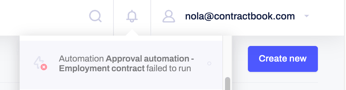
How can I fix a failed automation?
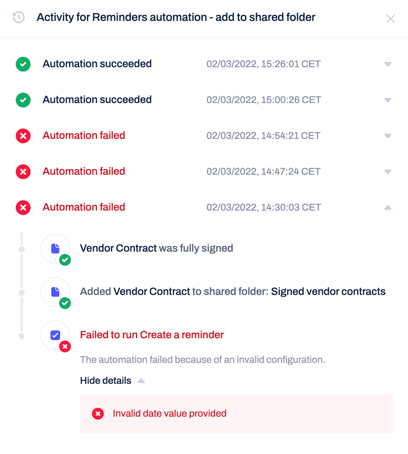
In case the automation has failed, you can access the detailed view by clicking on the failed notification in the list under your profile notifications:
In this view, you can identify the reason for the failure by expanding the failure to run details. You can then use the information found here to change the approval automation from the configuration settings.
How can I check the automation runs successfully?
If your reminder automation has run successfully, you can open the signed contract created from the chosen template.
There should be automatically assigned in the task sidebar view renewal reminder task with the same properties as the ones you have picked under the configuration of your automation.
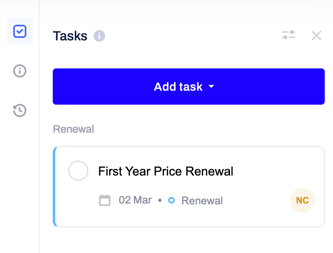
Using the functionalities of the Contractbook task sidebar view, you can amend any changes to the created reminder task, including marking it as resolved.
Note: you can only mark a task as completed if you are assigned to it.
- Of course, you can also find the task in the general tasks management dashboard, which allows you to adjust the task's properties and directly access the document it is assigned to.
- As usual, you will also be able to see that there has been a new pending task in the documents view when locating the signed contract created from the template chosen for the automation flow:

- Now that you have tested the automation workflow, you are ready to start using it actively and save time by assigning reminders for any type of task to the relevant individuals.
- With the in-app automation builder, you ensure that you always meet that deadline.
Contact us anytime via our Support Chat or email if you need additional information or assistance.