Create a new blank template for contracts
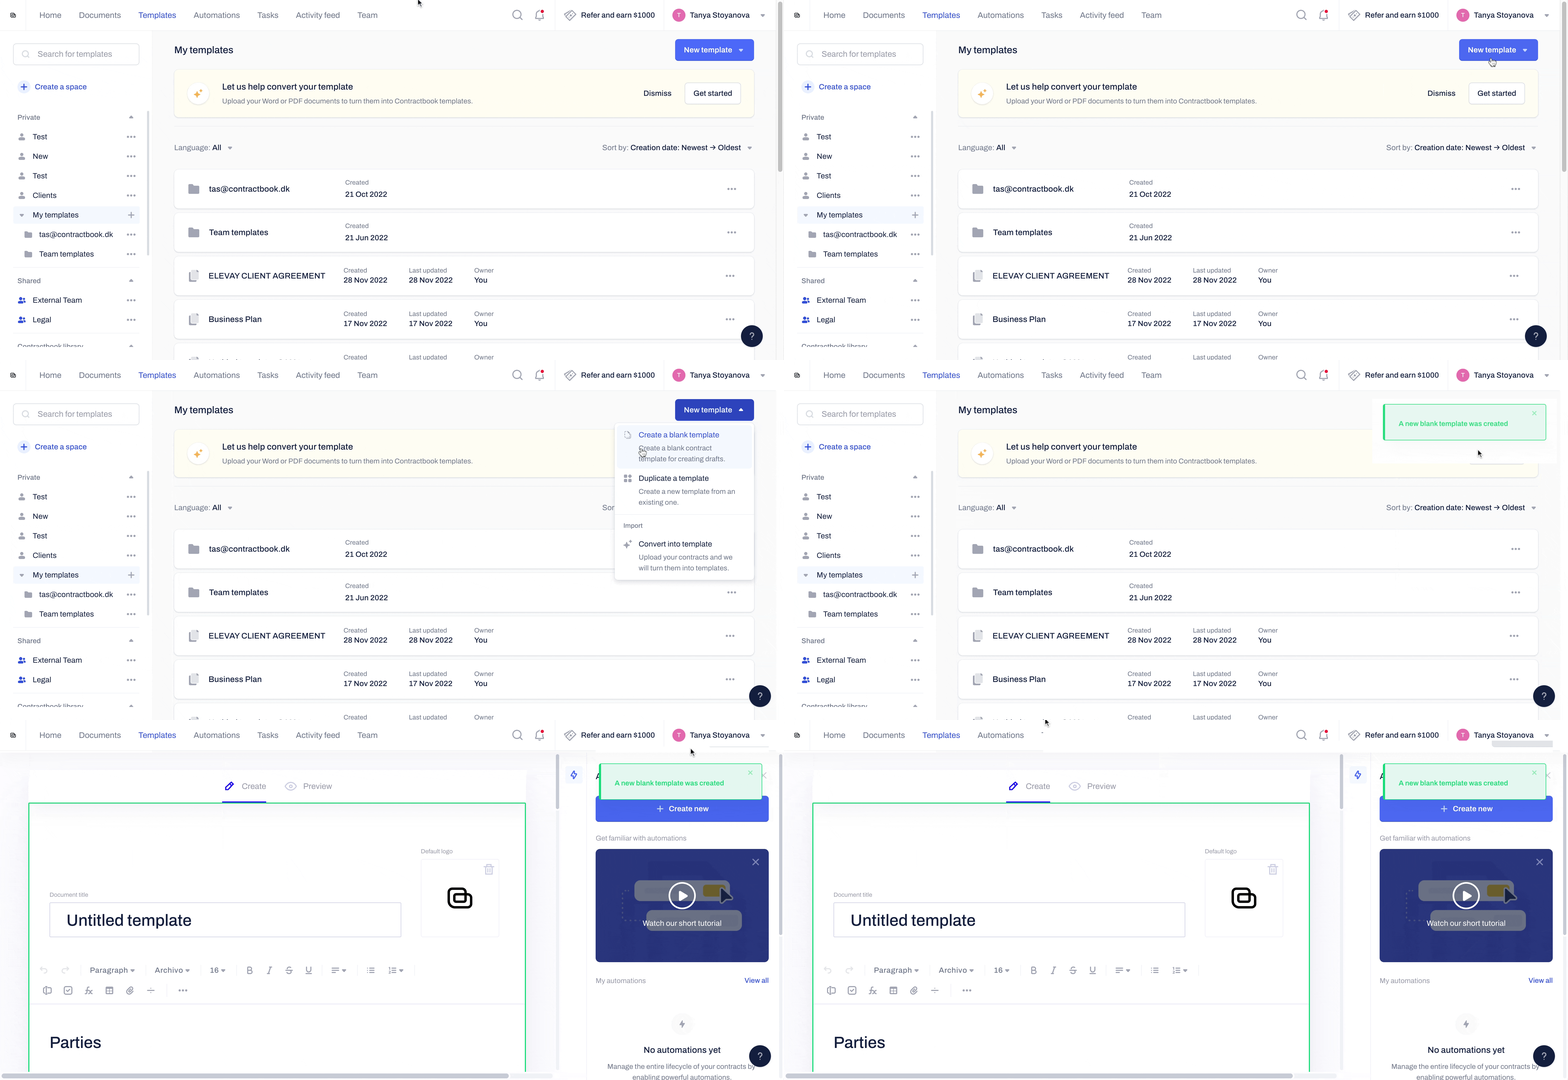
- From the Templates tab of the main menu, click on the blue button Add new template and choose the option to Create a blank template:
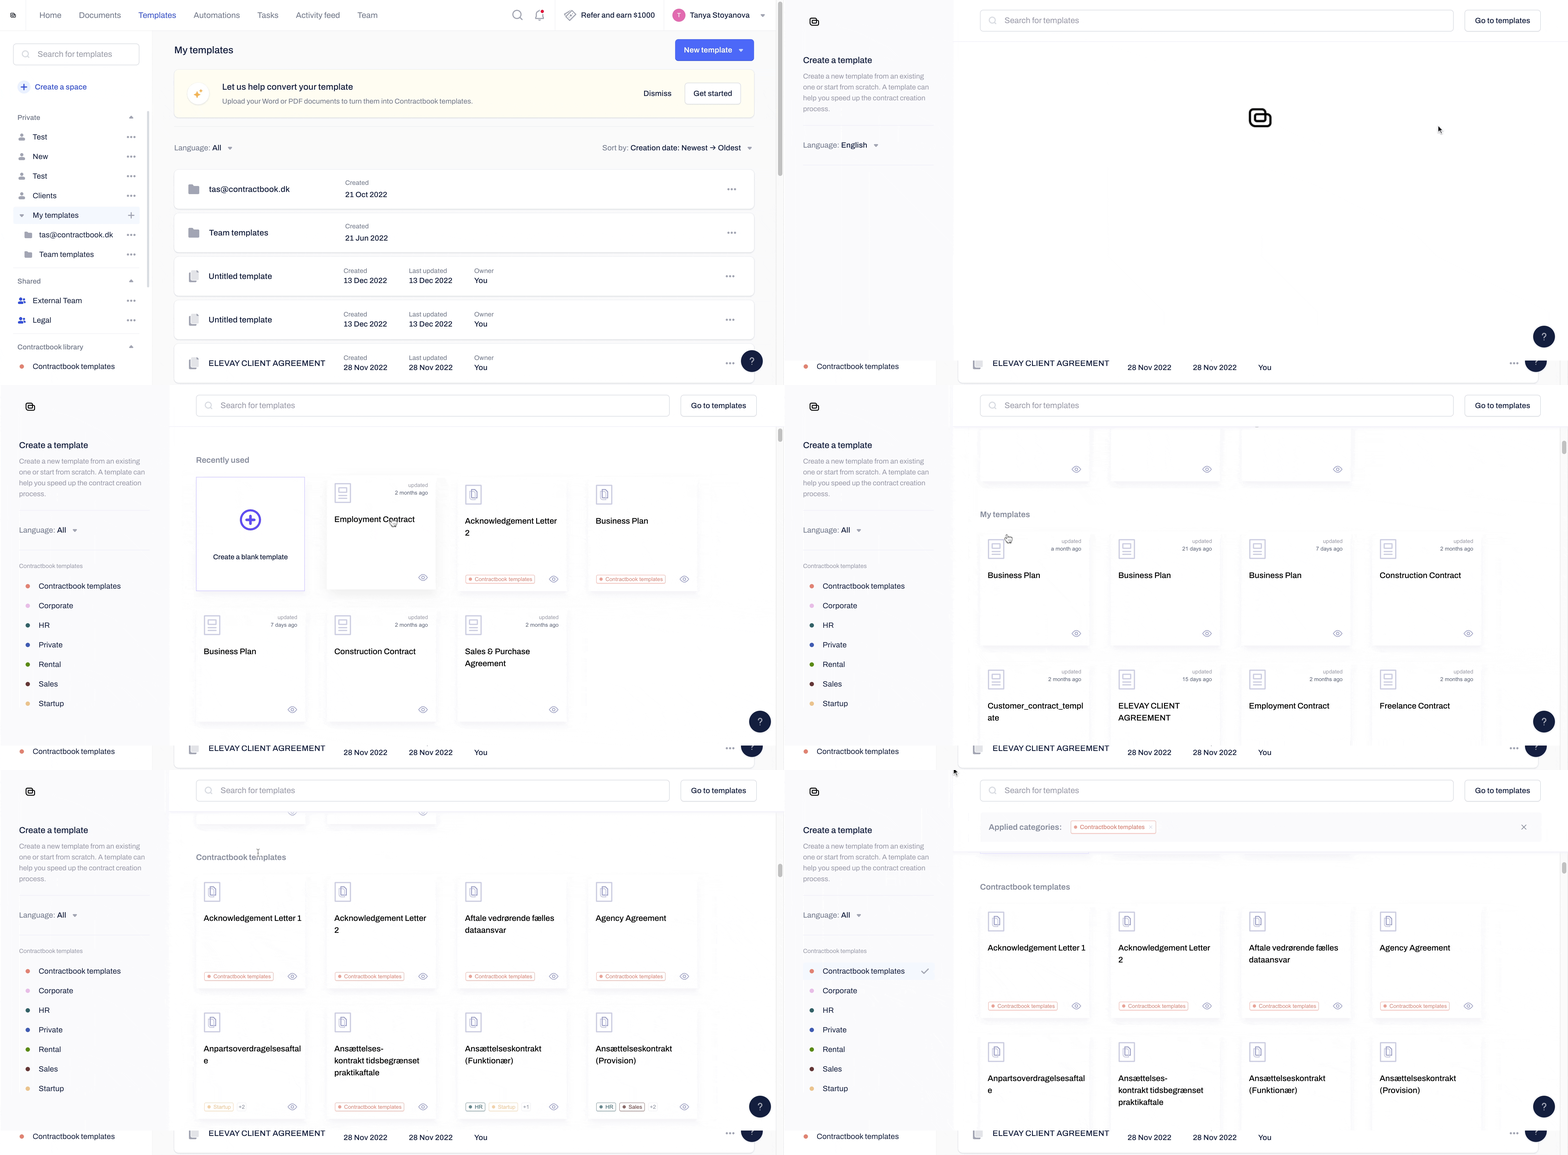
- If you decide to Duplicate a template instead, you will get an overview of all your recently used templates, as well as the pre-made Contractbook templates from our own library, which you can choose to customize instead of starting from scratch:
Add your company logo
- Adding your logo to the template means that every new draft created from that template will automatically include the logo. You can choose to select one of the following options:
- Use your team logo
- Upload a new logo

Add content to the body of your template
- To start creating the body of your template, you need to activate the Create mode first by switching from Preview from the top navigation bar:
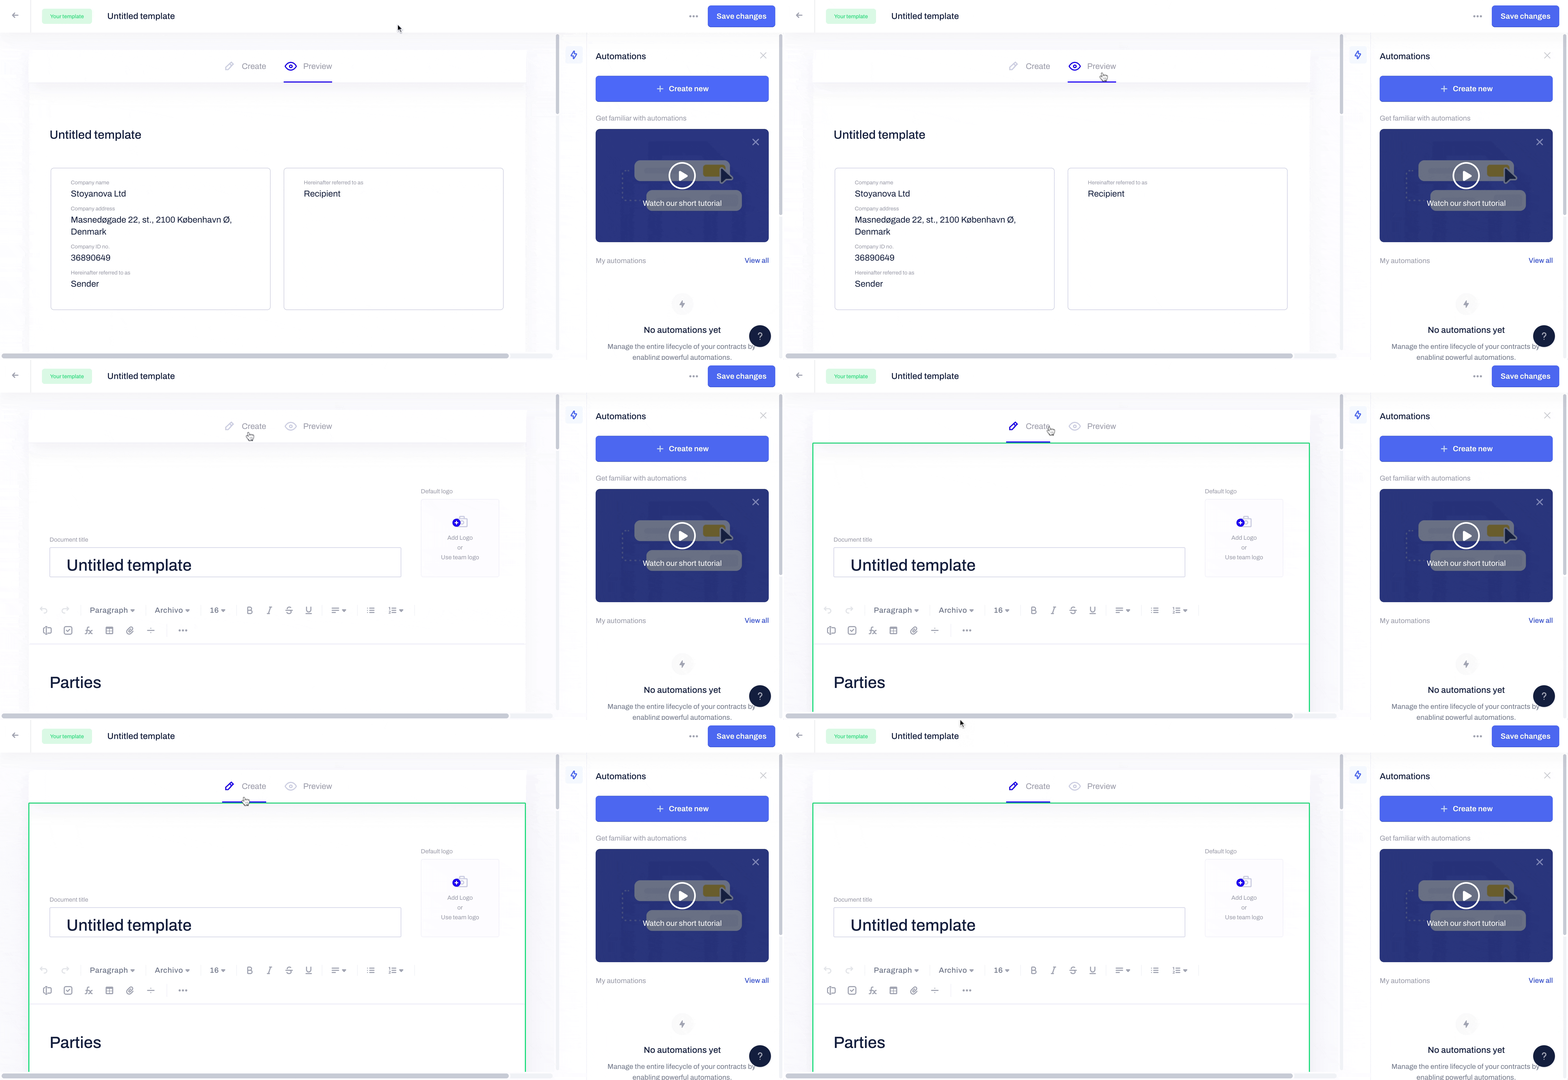
- If you wish to add content from an existing document, copy/paste it between the two pre-created boxes dedicated to the parties and signatures fields.
- If the content is formatted wrong after pasting it into the editor, try to remove it and paste again by right-clicking and choosing Paste and match style or Paste without formatting.
- Alternatively, you can manually type the body text between the two boxes.
Basic formatting of your template
- Contractbook Editor offers several options for formatting your new contract template.

- Undo/redo the last change.
- Paragraph style (where you find text formatting options such as code and headings).
- Font and font size.
- Bold, italic, underline & strikethrough.
- Text alignment.
- Lists.
- Data fields.
- Formula.
- Table.
- Checkboxes.
- Embedded attachment.
- Horizontal rule.
- Further options.

- Learn more about the use of Contractbook editor here.
Data fields and metadata fields
Adding data and metadata fields to your template is the key to creating data-rich documents which can be used across your team and in all your automations.
- Step 1: To add data fields, start by accessing the data fields section of the righthand sidebar, and create a new one with the use of the default data fields
- Step 2: You can also choose the Data field action from the Editor's options
- Step 3: Add the Data field's properties (Value and Name), and define a description for the field as an optional step
Learn more about Data fields here and the internal use of Metadata fields here.
Attachments
- To add attachments to your template, scroll down to the bottom and click on Upload attachment.
- The maximum file size is 45 MB, and we support the following file types:
.pdf, .doc, .docx, .jpg, .jpeg, .png, .csv, .xls, .xlsx, .xlsm, .txt

Creating a custom email message
You can add a custom message that will be sent along with the email notification to all recipients of contracts created from your template:

How can I use my template to send arrangements?
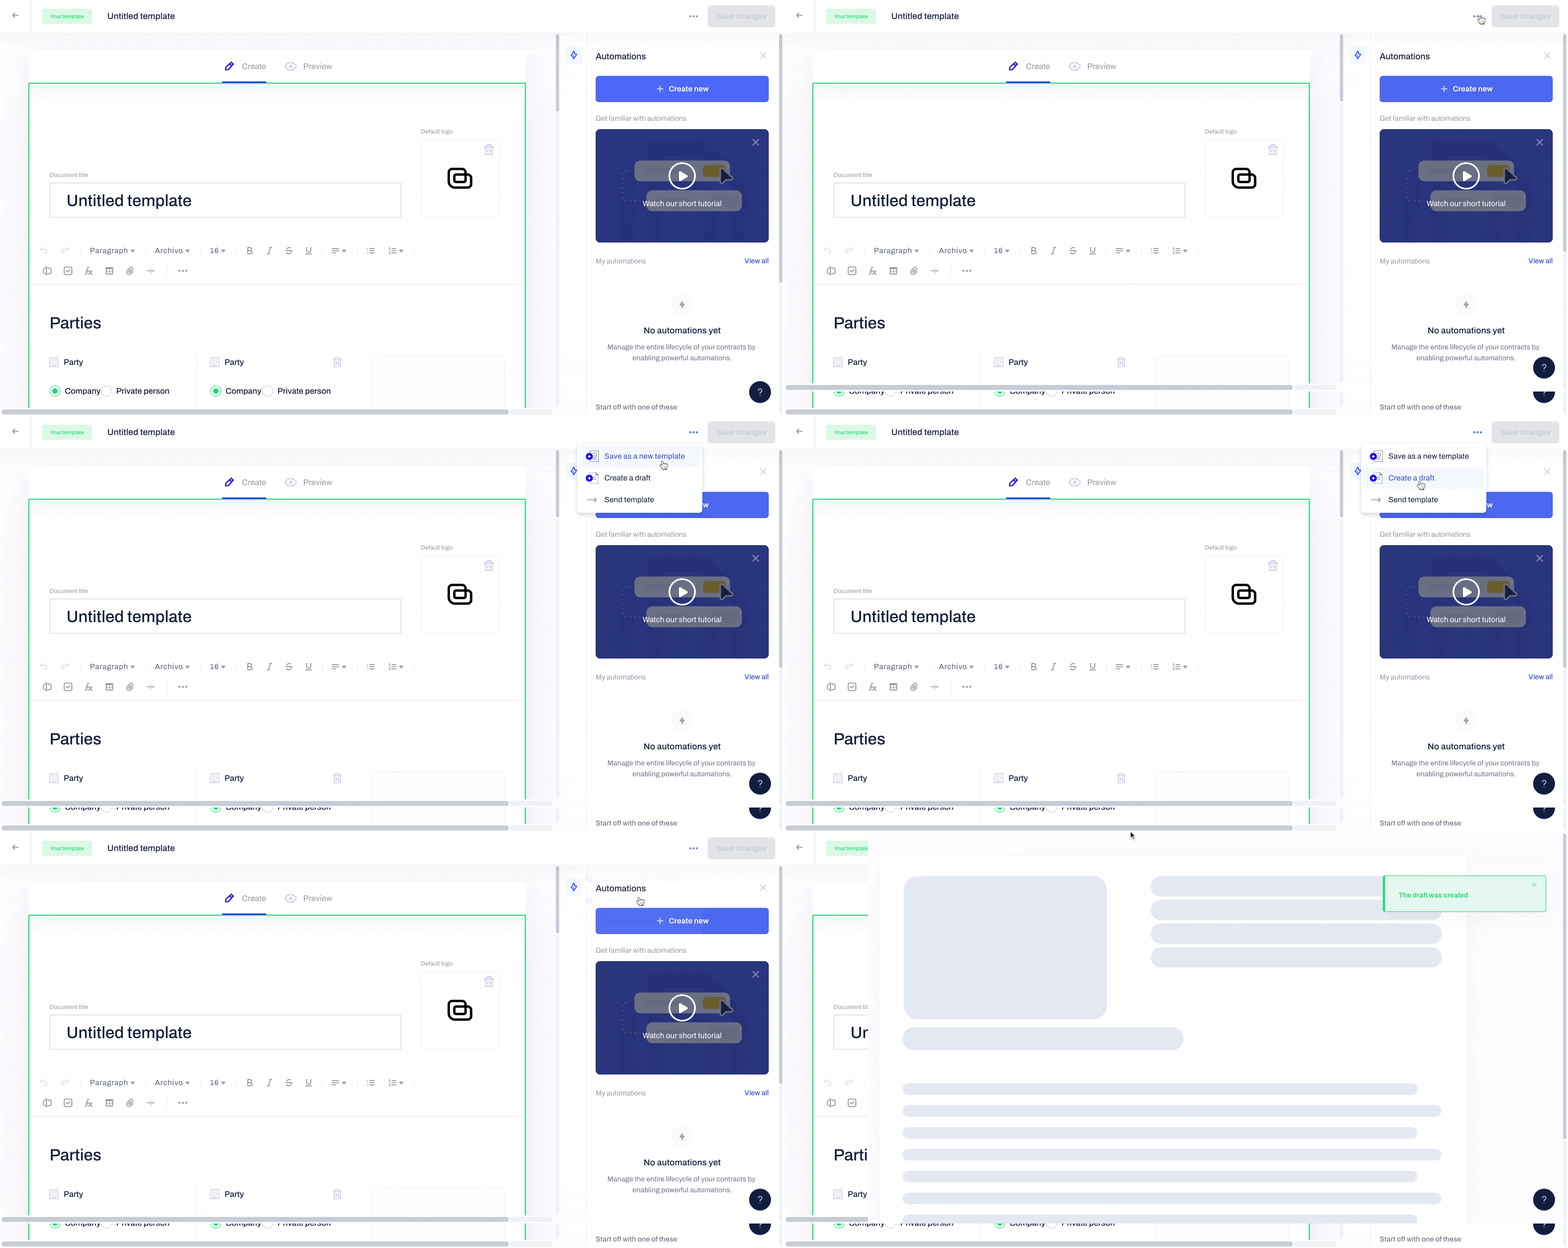
- Next time you need to send a contract based on the template you created, open the template you want to use and click on the three grey dots in the upper right-hand corner.
- Then choose to Create a draft:
- Alternatively, you can create a new draft directly from your Templates overview:
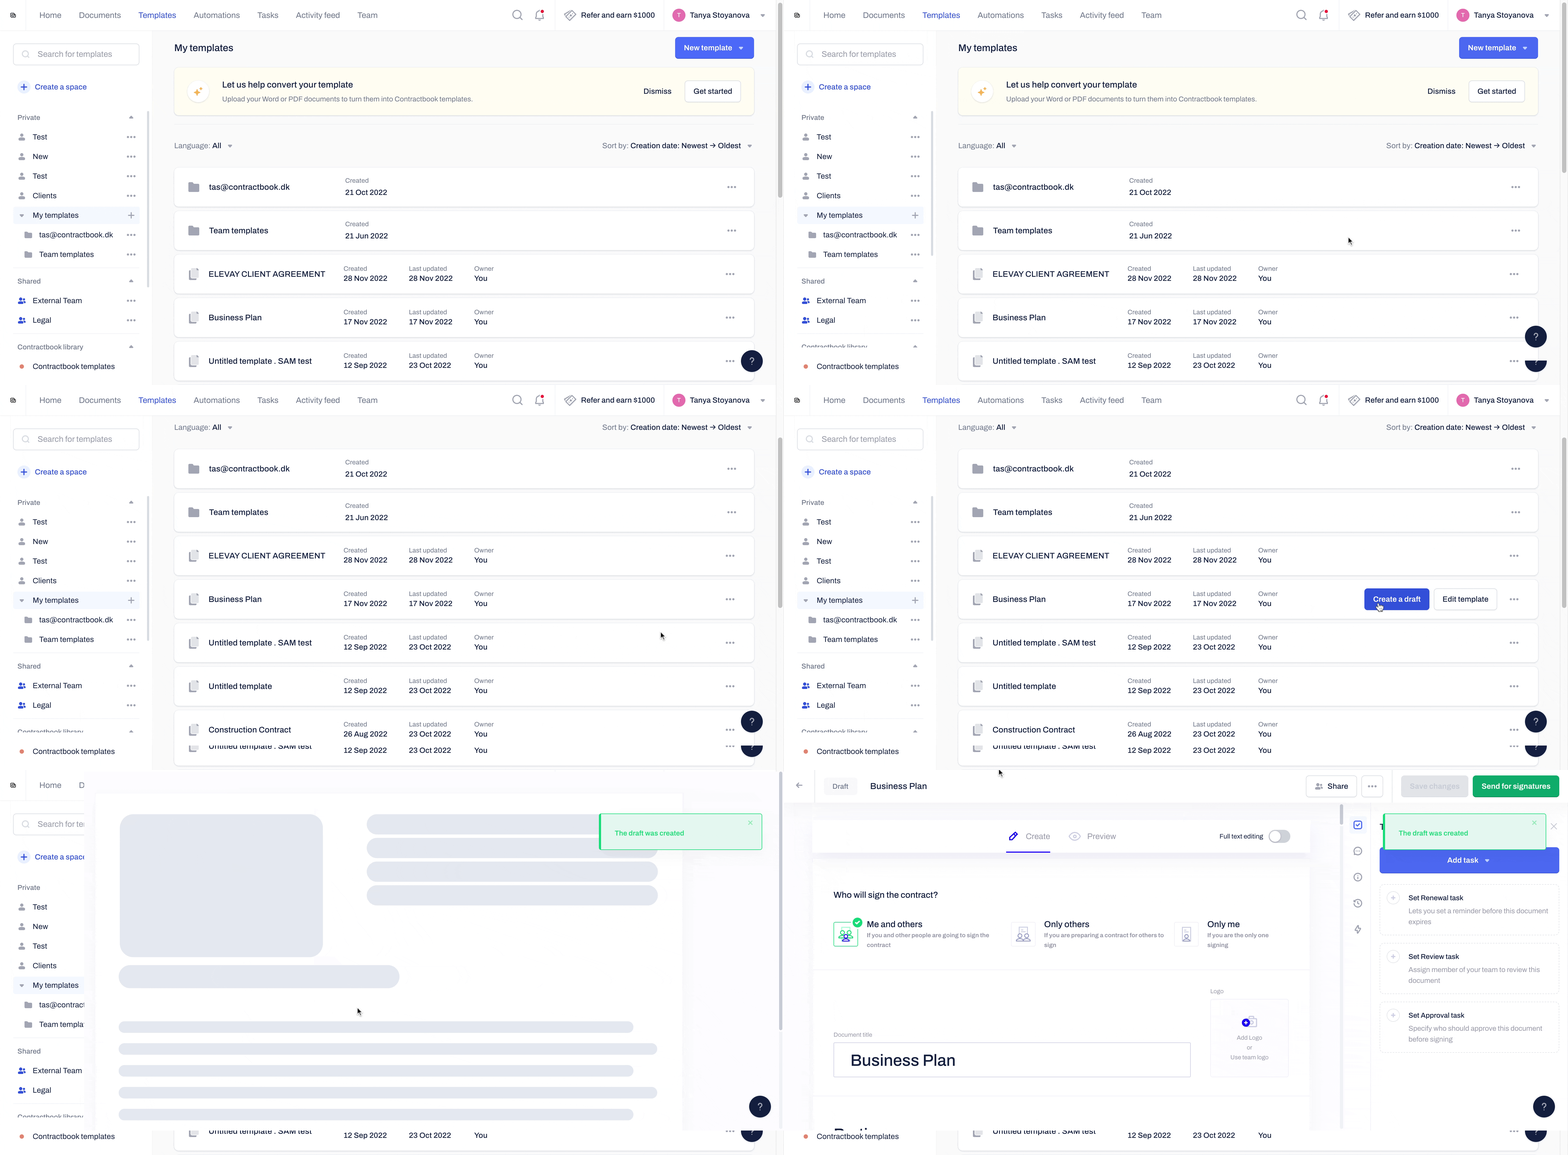
This will automatically open identical to your template document but in a draft state, allowing you to make further edits and eventually send the contract for signatures.
Sharing templates with others
- You can create a Space and add templates to it.
- Then choose the correct permissions for each collaborator and invite your teammates to work on the same contract templates.
- Save time and resources while working in sync with the rest of the team.
- Use any shared space templates available in the data fields to configure your organization's automated workflows with the help of the in-app automation builder.
If you still need additional information or assistance, reach out to us anytime by contacting our Support Team.
