This article guides you on creating and signing a PDF contract independently or collaboratively with other users.
It contains the following topics:
You can sign an uploaded PDF in Contractbook in two different ways:
- Place signature fields on a PDF and sign with a hand-drawn signature
- Upload a PDF as an attachment and choose from a variety of signature methods
Create and sign a PDF with the "Draw to sign" method in Contractbook

This option lets you place signature fields and custom fields directly on the PDF and sign it with a hand-drawn signature.
- Go to the Contracts tab.
- Click on New and select "Sign a PDF".
- Choose "Draw to sign" from the options in the dialogue box.
- Confirm by clicking on Continue.
- A new blank draft will be created and named after the file name you have chosen.
- You can always rename the draft by editing the default title.
- In create mode, drag and drop your PDF contract from your computer.
- Use the preview mode to view how the contract will be presented to a recipient or a collaborator.
- Your Contractbook account will be used to create a signee, which can be seen in the Signees sidebar on the screen's right side.
How can I add the signees to the uploaded PDF?
Adding signees from the sidebar
After the upload is completed, you can add signature fields for the signees.
- In create mode, add all parties that are representative of signees
- Adding parties is necessary if you want to assign data fields to a recipient or a collaborator of the PDF contract.
- Once parties are created, add signees from the sidebar by clicking Create new signee.
- From there, you can search for existing signees or create new signees
- Once the signees are added, you can select the option to sign the contract in a specific order.
- If a signee is deleted from the sidebar, this change will only apply to the document's signee list. You will still be able to add them again from the list of signees under Add signee:
- Please be mindful that deleting a signee does not trigger the deletion of a party connected to that signee. Parties must be deleted separately.
- Deleting signees from a contract is followed by the removal of signature boxes.
Adding signature fields to the PDF
After a new signee is added to the document (see above), you can add a new signature field for them.
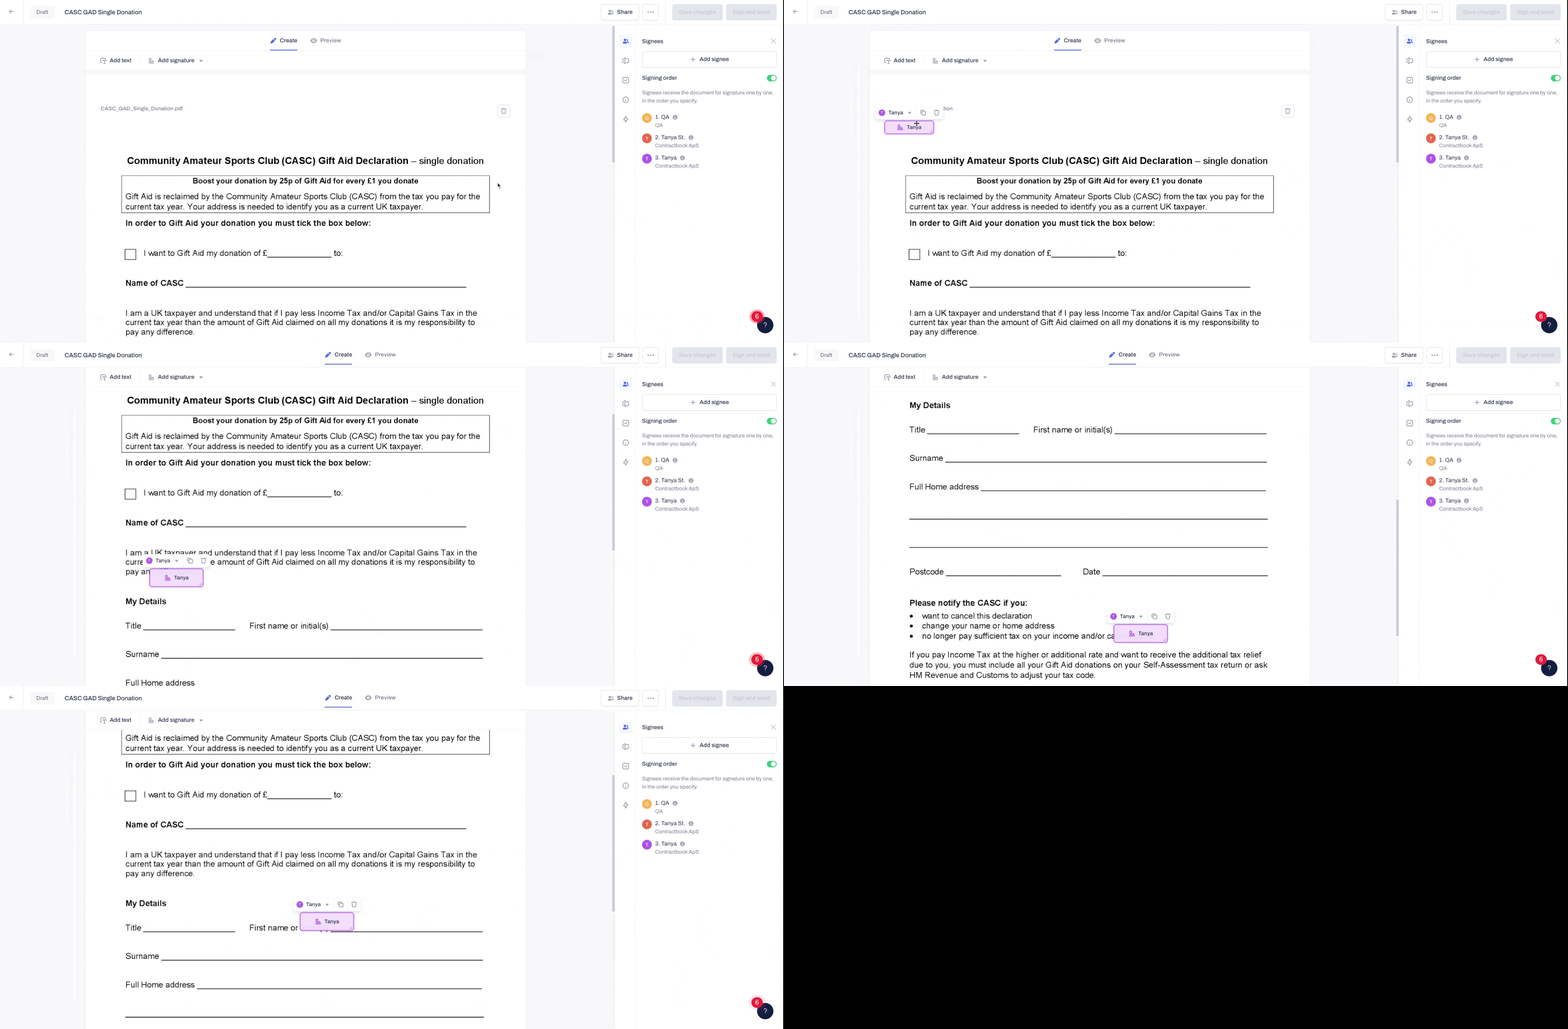
- To add a signee's signature field to the PDF, click Add signature and select their name from the drop-down list.
- This will automatically add a signature field for their hand-drawn signature.
- You can resize the field, assign it to another signee, or delete it. Place the signature field on the PDF at the location where you want the signee's signature to appear:

- You can modify the size of the signature field by dragging the lower right-hand corner of the field:

- You can also set a signing order for all signees. To do so:
-
- Enable Sign in specific order toggle.
- Set the order by choosing an order number from the change order list-picker.
- Once sent for signature, signees will be notified to sign the document in the sequence order:
- After a contract is signed, the signature fields are turned into timestamped green-coloured fields.
How can I add custom fields to a PDF contract?
- In addition to the signature fields, you can add custom fields (Data Fields) that can be assigned and filled by a recipient or collaborator. Click the Add field to create a new Data Field.
- Learn more about Data Fields here.
- Search for a field using the search bar to see if the desired field exists in the Data Fields Library. If yes, reuse it to keep the data structure persistent.
- If the field does not appear in the search, create a new one by clicking the Create new field button.
- Name a new field in a unique way, preserving the consistent naming convention of already available Data Fields in your company.
- For example, if all names of your Data Fields start with the first capital later, continue this practice (ex. Start date).
- A newly created field is available in all contracts across your company and can be reused repeatedly.
- Choose a field type from the available options: Text, Number, Date, Select, Checkbox and click Create.
- A new Data Field is always added to the top right corner of the page you are on. You can move it to any part of the PDF contract by simply dragging and dropping it.
- Fill the field with the applicable information or assign an empty field to a recipient added as a signee or a collaborator. Once a contract is sent for signature, a recipient will be guided to fill it out before signing it.
- You can define the font style and size in pixels or delete the field.
- You can modify the size of the field by dragging the lower right-hand corner of its borders.
- To get a good overview of all the added fields to the PDF contract, switch the sidebar view from the Signees to the Data Fields.
- Change to preview mode and check the final design of your PDF contract.
Sending the PDF for signature
Once signature fields and Data Fields are added to the contract, you can start the signature process.
Please note that if the document does not have signature fields, you will not be able to send it for signature.
- To start the signing process, click send and sign.
- Draw your signature and accept the terms by turning on the toggle.
- If you are unsatisfied with your hand-drawn signature, you can draw it again and as many times as you wish.
- You can also save your signature for future use.
- The draft will become a pending contract and be sent to the remaining signees for signature.
- The completed and pending signatures are highlighted in the Signees sidebar.
You can also monitor the contract’s status in the Contracts View. A fully signed contract will change its status from pending to signed.
What does a recipient need to do to sign the contract?
- Once the contract is sent for signature, a recipient receives an email that takes them directly to sign it. The message is auto-generated and cannot be adjusted.
- If some of the Data Fields are assigned to a recipient, the system will guide them in filling out the Data Fields first.
- Once all Data Fields are filled out, a recipient can sign the contract using a hand-drawn signature.
- The signature field will be turned into a timestamped green-coloured field.
- After signing, a recipient can view the contract again by clicking Proceed to contract or downloading it on their device. The same actions can be taken from the confirmation email sent to a recipient.

- A recipient can reject the contract or suggest changes. The changes will be shared with the contract owner via email and communicated in the Contracts View with the new status changes requested.

Can a recipient sign the PDF in multiple places?
Yes! You can add more than one signature field for the same signee.
If multiple signature fields were added for a recipient, the signature process happens only once, replacing all signature fields with a timestamped green-coloured field.
Can I edit a PDF contract after it was sent for signature?
Once a contract is sent for signature and its status has changed to pending, you can no longer edit it.
You can only send an email reminder to a recipient or delete the contract.
How can I sign a PDF contract using other signing methods?
You can use the default Contractbook draft's structure to upload a PDF as an attachment and choose from a variety of signing methods by following these steps:
- Go to the Documents tab of the main menu and click on the New document button in the upper right-hand corner.
- Choose the option to Sign a PDF from the drop-down list.
- Now choose "Use other methods" from the options in the dialogue box.
- Confirm by clicking on Continue.
- A new blank draft with the auto-generated title "Sign attached document(s)" will be created.
- You can always rename the draft by editing the default title.
- In create mode, you can drag and drop any files with the following formats directly from your computer: .pdf, .doc, .docx, .jpg, .png, .jpeg.
How can I create a data-rich contract from an attachment?
The data-rich format of all Contactbook drafts allows you to customize the contents and eventually sign and send a contract with any of your pre-existing files as an attachment.

- It is not possible to add data fields when signing a PDF. We, therefore, recommend that you create your documents from smart templates and enrich them with data fields.
- They are the foundation for creating automated contract workflows and allow an instant overview of your contract data.
- Using smart templates during integrations with your tech stack lets you extract any contract data to your tools anytime.
What document edits can I make when signing a PDF as an attachment?
- In create mode, you can start by changing the draft's generic name to the one that best fits your contract.
- You can also upload a new one or use your team logo:

Chose who will sign the contract

Add your and the recipient's contact information
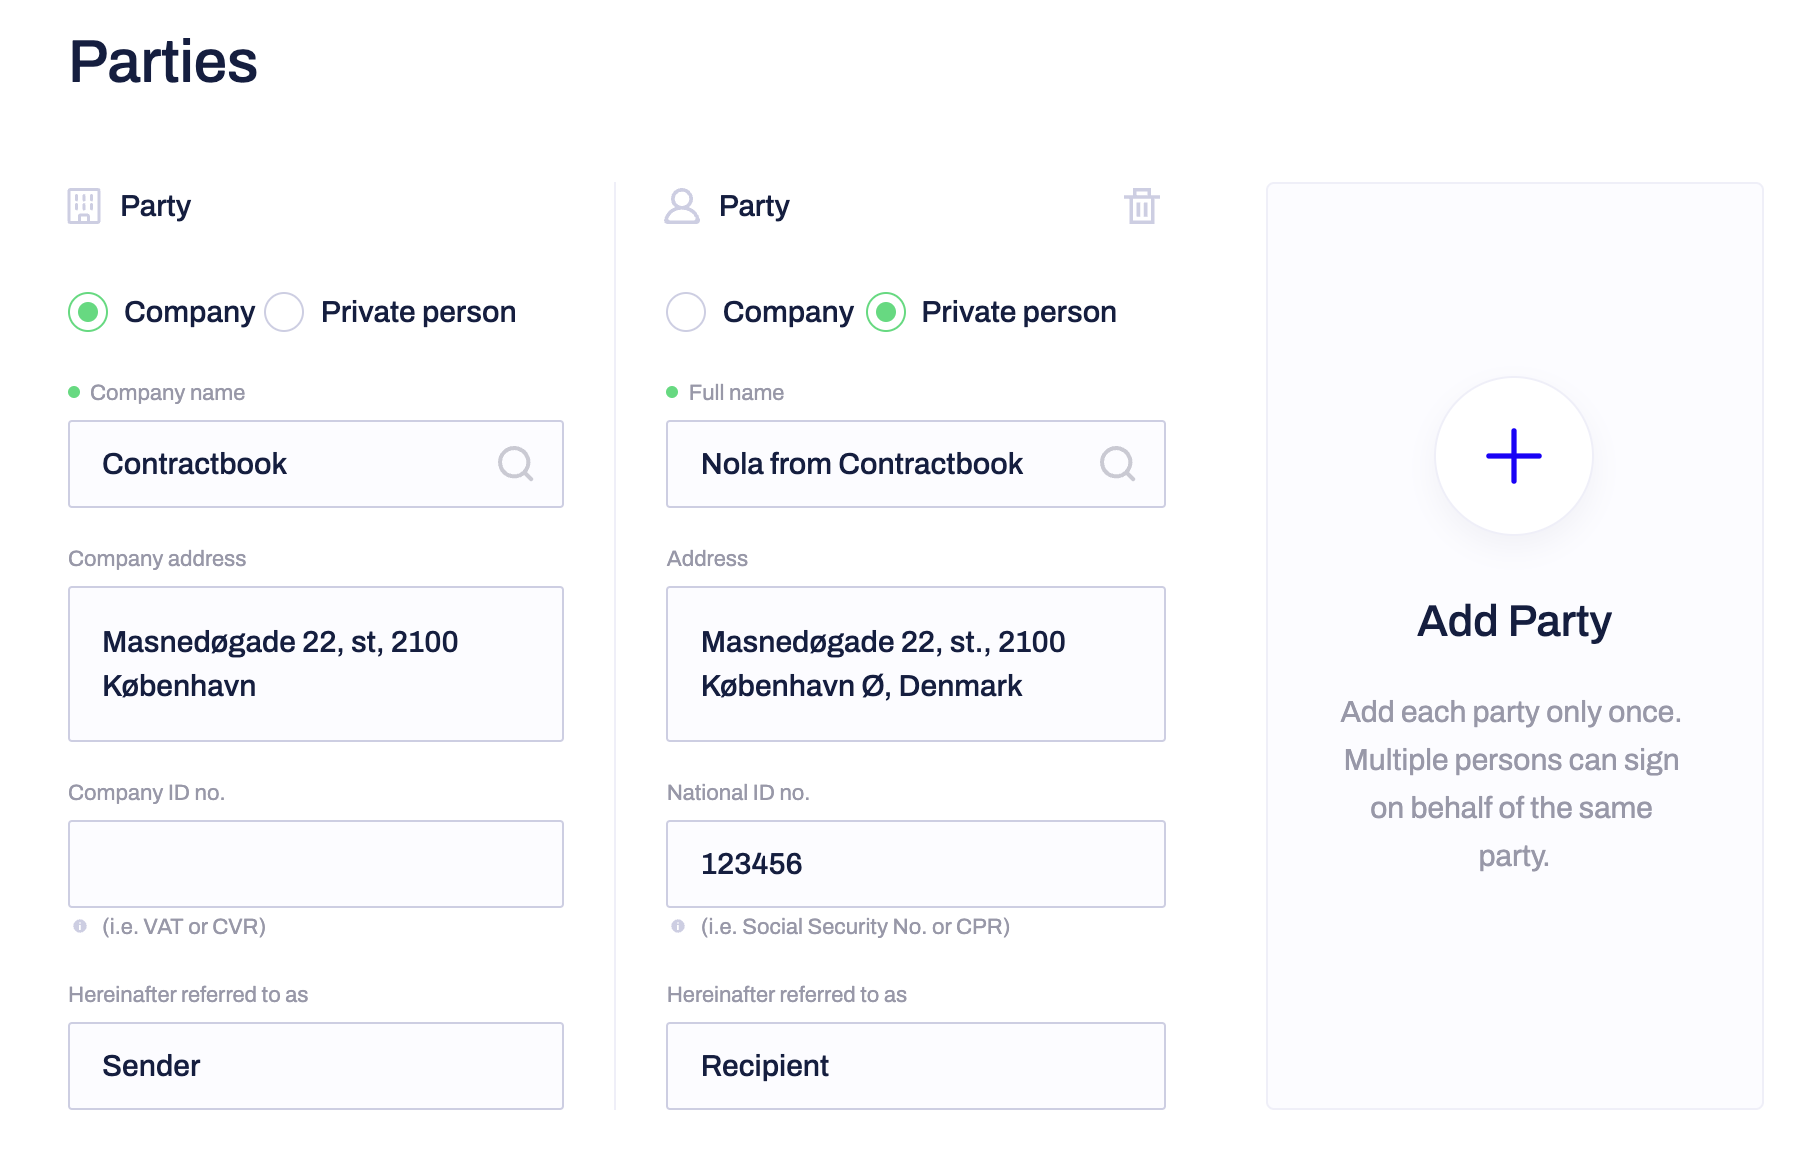
- In the Parties section, you can add your own and the contact information of any additional recipients (if you will be signing the contract with others).
- You can choose between a Company profile and a Private person regarding the representatives who will be signing the contract.
- Remember to update your Contractbook contact list to auto-generate the details in this section with a single click.

Attach the file you want to sign
Now to the most significant step. You can attach the file you want to be signed by clicking on the blue button choose a file that can be found below the parties section:

- The maximum file size is 45 MB, and the file types we support are .pdf, .jpg, .png, .doc, and .docx.
- After the first file has been attached, you can add additional attachments by clicking on the available under it button called upload a document:

- All attachments in Contractbook are scanned with an OCR technology, which allows you to set automated tasks based on extracted dates available in these attachments.
- You can decide to remove any attached file, if needed, by clicking on Remove in its upper right-hand corner or Download it at any later point in time:
![]()
Initiate the signature process
- The last steps are to fill in the signatures field, customize the email message to the recipient, choose the signature method you want all signees to use and send for signatures.
- By pressing Sign and send or Send for signatures (depending on who will be signing the contract), you will turn the draft into a contract, and the signature process will be initiated.

- You will now be able to monitor the status of your contract and save it as a new draft or a template, which you can use and sign as a new contract unlimited times in the future.
If you still need additional information or assistance, contact us anytime by contacting our Support Team.
