
This article will show you how to use the "create or update data fields" automation action.
It contains the following topics:
- Using the "create or update data fields" automation action
- Automation setup
- Configuring the automation trigger
- Configuring the automation action
- Mapping the fields in the automation builder
- Formatting date and number data fields in the automation builder
- Publishing the automation
- Testing the automation workflow
- Fixing a failed automation
- Checking a successfully run automation
How can I use the "create or update data fields" automation action?
- You can enrich all your documents by automatically creating new data or metadata fields.
- If the data or metadata fields already exist, you can automatically update their values.
- As an example, in this article, we will base the update of a metadata field on a full contract signature, but you can use any of the triggers available in the automation builder listed in this article.
- Additional possible use cases may include:
- Keep metadata of signed contract in sync with CRM deal:
- Trigger: When a HubSpot deal stage is changed
- Action: Create or update data fields - Update the metadata field of a contract based on the value from a deal property
- Automatic creation of metadata fields on uploaded documents:
- Trigger: A form is completed
- Action: Upload a document - using the attachment uploaded by the user who filled out the form
- Action: Create or update data fields - used to enrich the uploaded document with metadata fields, such as expiry date (this data can come from the filled form)
- Keep metadata of signed contract in sync with CRM deal:
How to automatically update a contract date upon completed signature?
The use case we will build in this article will help us to automatically update the contract's start date based on its full signature.
- Update of a metadata field after the contract is signed:
- Trigger: The contract is fully signed.
- Action: Create or update data fields - after the contract is signed, update the start date available in a metadata field to match the counter-party's signature date.
Configuring the automation trigger:
- Click on the Automations tab from the main menu and then on the blue button Create new at the upper right-hand corner.
- You will be redirected to a pop-up window where you can customize the automation's setup. To begin with, select the trigger you need from the drop-down menu. In our case, we will choose "Contract is signed."
This will automatically open a configuration window to the right in which you can define which template should be used for the contract and which signature should start the automation. - After choosing the correct template and signature to trigger the automated flow, confirm by clicking Save:
Configuring the automation actions:
This step covers the action which will happen automatically when the contract is signed.
- You can use the search bar to locate the option Create or update data fields.
- A new configuration window will appear on the right side of the screen.
- Start by defining the document ID:
- You can type it in manually by getting the ID of any of your existing documents.
- Or use a variable to select the document ID:
How can I map out the data fields I need to create or update?
After defining the document ID in which you want your data fields to be created or updated, you can start mapping out their values.
- Type in the name of the field you want to create or select one of the existing data or metadata fields.
- You can use the data and metadata fields, party, and signee details available in the selected document, or manually insert the values of each field you add in this step.
- If the field does not exist in the document yet, as the automation runs, it will be created with the attributes you have chosen while configuring the action:
- You can add as many data or metadata fields as you need to update or create.
- Click Save to validate the completion of the form fields.
Can I format number and date data fields in the automation builder?
If the fields' type is number or date, you will also have the option to determine which specific formatting option will be used for any created or updated data fields with this type once the automation runs.
- Use the current or default setting:
- For any updated date or number fields, their current formatting will be applied.
- For all created date or number fields, the document language will define the applied after the automation formatting:
How can I publish my automation?
- Lastly, you can give the automation a new name from the upper left-side corner (by clicking on the small pencil icon) and click publish once the configuration is completed.
❗️Important: If you need to make any changes to the automation flow at one point, remember to unpublish it first, then make the necessary edits and click again on publish to put the flow into practice.
- You can control that by turning the status toggle bar on or off:

- If you click on the three grey dots next to the status toggle bar, you can open, rename, delete, or see the activity feed of the automation.
- Remember that the automation must be active (published) for the activities to be available to see.
- This option allows you full traceability of the automation's usage and flow:

- In the activity sidebar, you can see all the details of when the automation was used and the steps taken before it was triggered.
- Just click on the small arrow next to the date and time to expand the details.
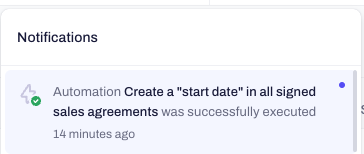
- In addition, you will always be notified in-app in the notifications at the top navigation bar as soon as any of your automation flows has been executed:
❗️Important: You can modify your email and in-app notifications under profile settings for your account. You are not able to control your recipient's messages.
How can I test the "create or update data fields" automation action?
- First, you'll need to complete the trigger event you selected - in our case, the full signature of a contract created from the "Sales and purchase" template.
- Important: You can use an alias of your email address as the second signee - this way, you will be the second signee whose signature starts the automation.
- As soon as the action has been completed, return to your Contractbook account and check the in-app notifications under your tab.
- The automation status will be listed as either successful or failed.
What can I do if the automation fails?
- If the failed , you can access the detailed view by clicking on the failed notification in the list under your profile notifications.
- In this view, you can identify the reason for the failure by expanding the inability to run details. You can use the information found here to change the automation from the configuration settings.
How can I check the execution of a successfully run automation?
- If the automation has run successfully, you can open the signed contract and check all already existing or new data and metadata fields it is auto-populated with:
- The document must be auto-populated with all the data you inserted in the action configuration of the automation builder.
Using the "transform data" automation action:
- If you want to transform data sets by applying different date calculations to data and metadata fields, you can add the "transform data" action:
- As the "create or update data fields" automation action can be applied to multiple data and metadata fields at once, you can use the "transform data" action to transform their formatting at once by adding more sets of data:
- Read more about the types of data set transformations you can achieve with this automation action here.
How does the automation action work for data fields with "select" type?
- If you use a "select" type of data field, you can automatically select its value or create a new field for selection with a default option checked off.
- After the automation runs, the "select" data or metadata field will be created with the value you have configured in the automation builder.
- If the field already exists, its selected value will be updated with the option you have chosen in the automation builder.
- You can always return to the automation builder and edit details, add more steps, or change the flow.
- After testing the automation workflow, you can start using it, saving time by creating automatic workflows connected to your data and metadata field creation and updates.
If you need additional information or assistance, please contact us anytime via our online support chat or email .